Let’s gather some sparkle and make your entry merry and bright, without a single sad scratch on your trim. The secret is choosing the right hanger for your surface, then giving your garland solid support so winter wind does not tug it down.
Start with a quick trim and surface check
Before you hang anything, take one minute to figure out what you are attaching to. This decides which tools are safe.
- Painted wood trim: Avoid anything that relies on aggressive adhesive or screws. Paint can peel on older or poorly adhered finishes, and temperature swings can make that worse.
- Vinyl or aluminum wrapped trim: Skip nails and staples. Look for no-drill exterior hangers that grip an edge, or use a tension solution in a recessed area.
- Brick or stone around the door: Brick clips can be a hero, but only if the brick profile and layout give the clip a clean edge to grab.
- Smooth siding near the door: Use exterior-rated removable hooks only if the product specifically states it is safe for that material and temperature range.
Sprig tip: If your garland is heavy (real greenery, thick faux, added ornaments), plan for more attachment points than you think. A few extra supports look cleaner than one droopy corner.
Surface saver: Do not let bare metal wire, hooks, or zip tie heads rub directly on painted trim. If anything touches paint, add a tiny felt pad or a small wrap of soft fabric tape as a cushion.
How much garland do you need?
Buying the right length up front makes hanging easier and prevents that awkward too-short stretch at the top corner.
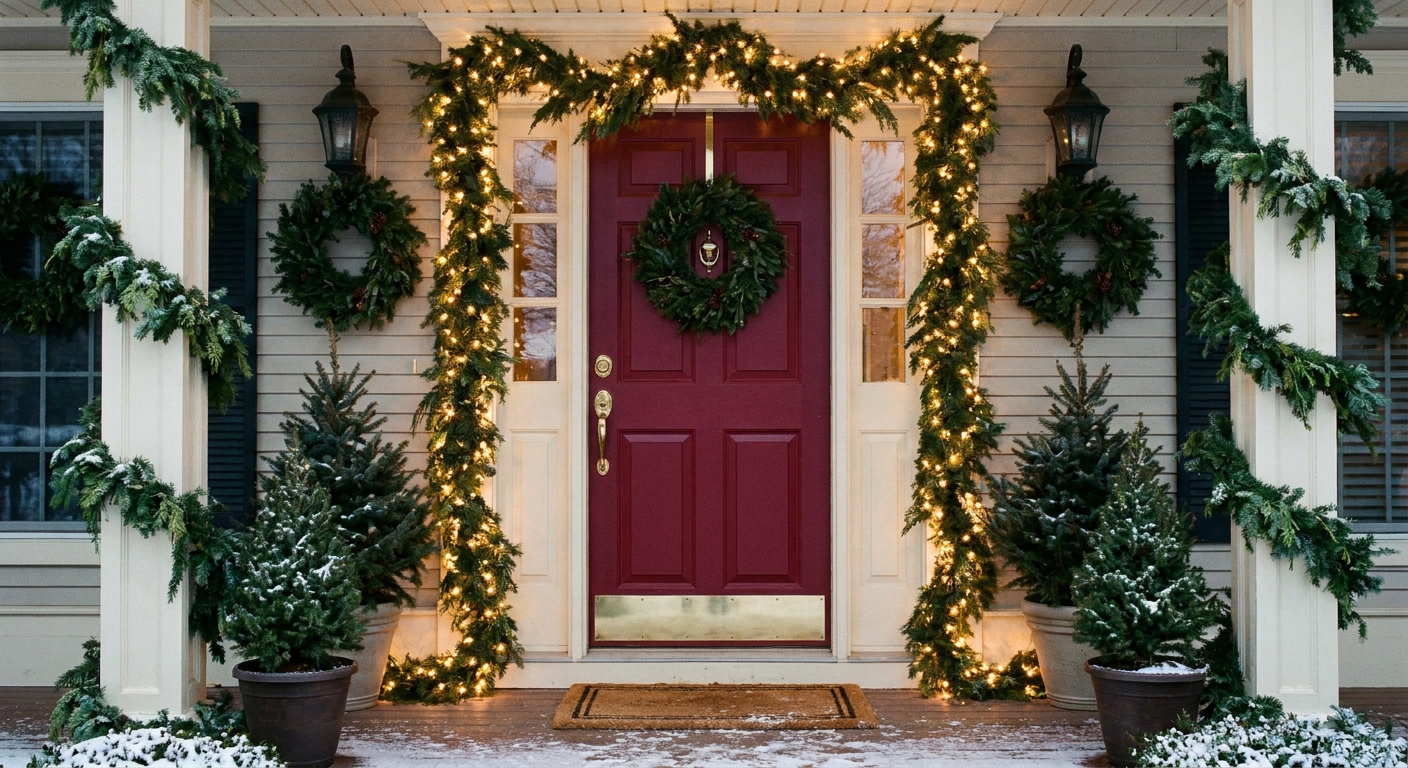
- Classic door frame: Measure the top width + both side heights. Add 10 to 20 percent extra if you want a gentle swag across the top.
- Extra full look: If you plan to layer garland (a base plus a topper), use the same measurement for each layer, but you can often go slightly shorter on the topper so it nests neatly.
- When in doubt: A little extra length is easier to disguise than coming up short.
Pick your hanging method (best no-damage options)
Here are the most trim-friendly ways to hang garland around a front door, starting with the most universally gentle options.
1) Tension rods for the top span (no holes, no adhesive)
Tension rods are wonderful when you can brace them inside a recessed entry or inside the door jamb where the ends press against solid, flat surfaces. Instead of sticking anything to the face of your trim, the rod holds itself in place by pressure.
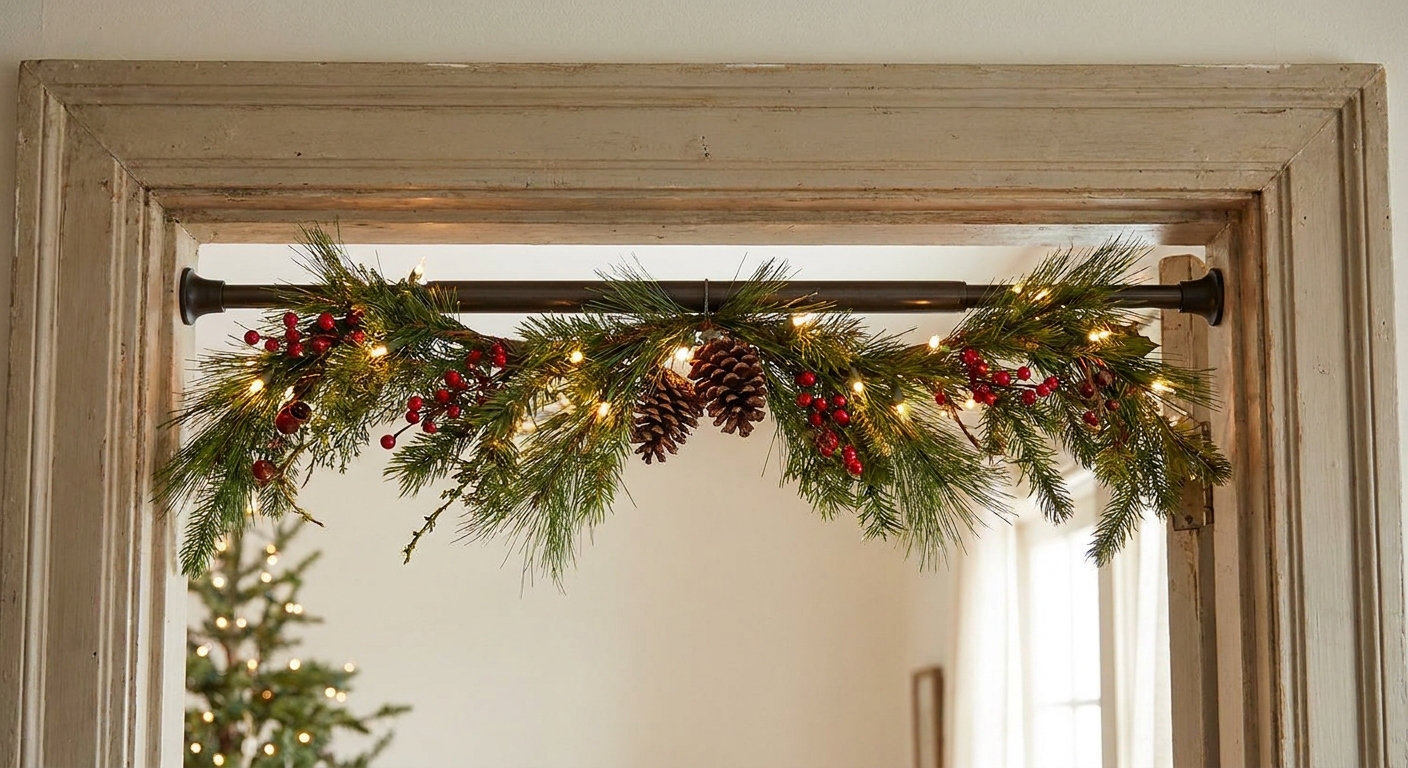
- Where it works best: Covered porch entries and recessed doorways where the rod stays sheltered from direct rain and strong wind.
- How to use it: Set the rod slightly above the door frame (inside the recess), then attach garland with zip ties, twist ties, or soft floral wire.
- How to protect surfaces: Add small felt pads where the rod ends press, especially on painted trim.
- Weight help: Use two rods (one slightly forward of the other) if you want a fuller, layered look. Keep both rods inside the recess so they do not interfere with the door swing, and tie garland to each rod at a few points so it cannot slide between them.
Important: Most tension rods are made for indoor use, so treat this as a sheltered-entry solution. In freezing or wet weather, check it regularly and switch methods if you see any slipping.
2) Brick clips for brick surrounds (strong and clean)
If your door is framed by brick, brick clips can hold garland beautifully without drilling into masonry. They grip the brick by hooking over edges, but they only work when the brick has a shape and mortar joint that lets the clip seat firmly.
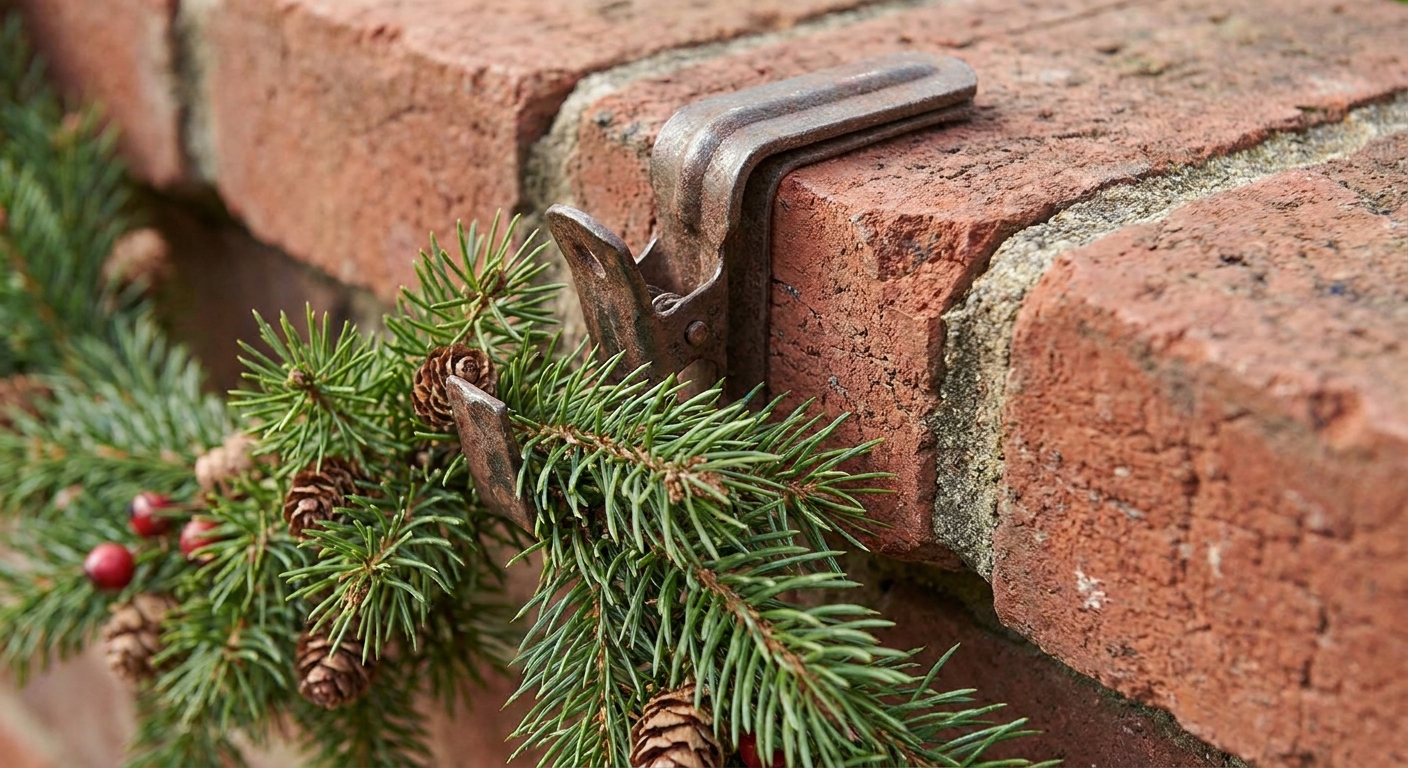
- Where it works best: Brick trim around doors, brick columns by the entry, and brick lintels with a clear edge.
- Check before you buy: Brick clips are sized by brick height and need a distinct brick edge to grab. Some layouts (like certain soldier courses), rounded edges, very uneven faces, or thick mortar can make clips unreliable.
- Placement idea: Use one clip near each upper corner, plus one or two along each side for heavy garland.
- Finish the look: Tuck the clip behind greenery so the hardware disappears.
Safety note: Make sure the clip is fully seated and cannot rock. If it wiggles, it is not the right match for your brick profile.
3) Specialized exterior trim hangers (made for outdoor edges)
If your trim has a lip or edge, exterior hangers that clamp or hook over the trim can be a great no-damage solution. Look for versions designed specifically for exterior use and the weight you need.
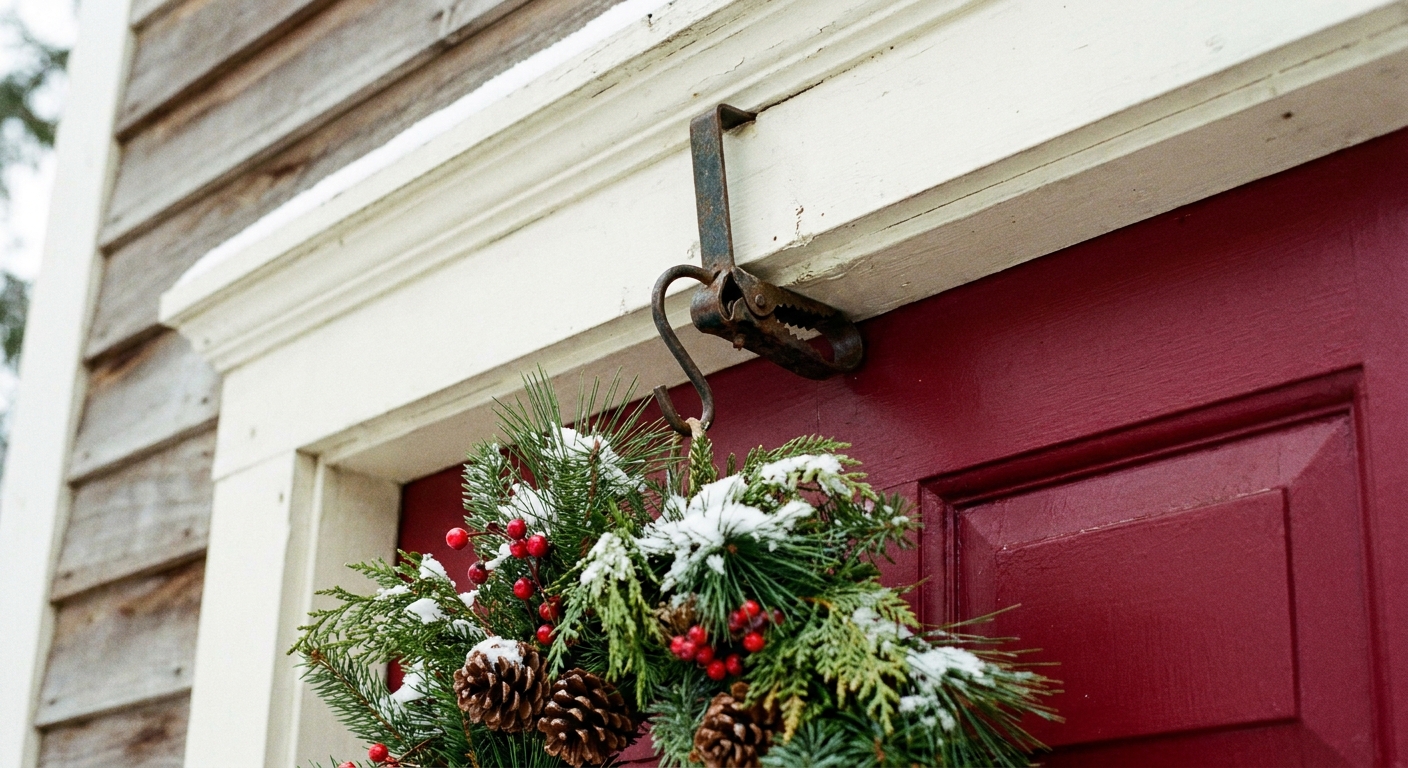
- Where it works best: Metal-wrapped trim, vinyl trim, and sturdy wood trim with a defined edge.
- What to look for: Rust-resistant material, padding where it touches trim, and a weight rating that matches your garland plan.
- Best use: Side runs of garland where you want consistent support. As a starting point, aim for support points every 12 to 18 inches for thicker or decorated garland, and widen spacing only if your garland is light and stable.
4) Exterior-rated removable adhesive hooks (use thoughtfully)
Removable hooks can work outdoors, but they are the most sensitive to moisture, temperature changes, and paint condition. Only use products labeled for outdoor use, and follow their temperature guidance closely.
- Where it works best: Sheltered porches where surfaces stay dry.
- Avoid on: Flaking paint, chalky surfaces, raw wood, or areas that get wet repeatedly.
- Make it safer: Clean the surface first (a quick wipe with isopropyl alcohol is a common best practice), let it dry fully, use more hooks with less weight per hook, and let adhesive cure for the recommended time before hanging garland.
If you want a similar no-nails approach indoors too, this Garland Glow guide is handy: Hang Heavy Garland on a Mantel Without Nails.
How to support heavy garland (so wind does not win)
Outdoor garland has two challenges: weight and movement. A secure install keeps greenery from sliding, sagging, or pulling hardware loose.
- Plan anchor points first: Mark where you want the garland to start, end, and drape. Put supports at corners and along long vertical runs.
- Use a strong attachment tie: Zip ties (trim the tails neatly), UV-resistant outdoor twist ties, or soft floral wire. If wire might touch paint, pad the contact point so it cannot abrade your finish.
- Build the garland in layers: If you want extra fullness, attach a lighter topper garland over a base garland rather than forcing one thick piece to do all the work.
- Secure the corners: Corners carry the most tension. Add a hidden tie at each upper corner so the drape stays even.
- Keep it off the swing path: Make sure garland will not catch the door handle or scrape as the door opens.
Step-by-step: A no-damage garland frame for most front doors
This approach works for many homes because it combines support across the top with secure sides.
- Measure your doorway: Note the width across the top and the height down each side where you want garland to fall. (Quick math: top width + both side heights, plus a little extra for swag.)
- Choose your top support: Use a tension rod in a recessed entry, or exterior trim hangers if you have an edge to hook over. For brick surrounds, plan brick clips near the top corners.
- Dry fit the garland: Hold it in place and decide your drape. A gentle smile swag across the top looks classic and keeps the center from drooping too low.
- Anchor the top corners first: Attach garland at the upper left and upper right. Corners are your foundation.
- Secure the center top: Add one more support at the top center if the garland is heavy, it is windy, or you plan to decorate it.
- Add the side supports: Place hangers every 12 to 18 inches down each side as a starting point, then add more if you see sagging. Attach the garland so it hugs the frame neatly.
- Fluff and hide hardware: Rotate greenery to cover ties and hooks, then step back and check symmetry.
- Add lights last: Wrap lights after the garland is stable so you do not accidentally shift your anchors.
Fresh greenery tips (if you are using real garland)
Real greens are gorgeous, but outdoor wind and winter sun can dry them faster than you expect.
- Keep it shaded when you can: A covered porch helps slow drying.
- Mist lightly: A light misting can help in dry conditions, but skip it if temps are below freezing.
- Plan for a shorter lifespan: Real garland may need refreshing sooner in windy, sunny, or very cold weather.
Lights, cords, and weather: make it safe
Twinkle is wonderful. Safe twinkle is even better.
- Use outdoor-rated lights: Look for labels indicating outdoor use and inspect wires for damage.
- Keep connections protected: Elevate plugs off the ground and shield connections from direct rain when possible.
- Secure cords neatly: Loose cords flap in wind and can tug your garland down.
- Choose a timer: Outdoor timers reduce daily plugging and unplugging near damp areas.
For tidy, hidden power solutions that also work with holiday styling, see: How to Hide Battery Packs and Cords in Christmas Decor.
Common mistakes that damage trim (and what to do instead)
- Staples and nails into trim: They leave holes and can split wood. Use exterior hangers, brick clips, or a tension rod in a recessed spot.
- Regular indoor adhesive hooks outdoors: Moisture and temperature swings can cause failure. Use exterior-rated products only, or skip adhesive entirely.
- Too few support points: Heavy garland sags, then pulls. Add more anchors at corners and along long runs.
- Letting lights or ornaments carry the weight: Do not let your light strand, ribbon, or ornament hooks act like the structural support. Tie decorated sections back to your anchor points so the greenery is supported.
- Letting garland rub paint: Wind can act like sandpaper on trim. Add an extra tie to reduce movement, or shift the garland so it is not dragging across edges.
Quick FAQ
Can I use a wreath hanger for garland?
You can, but it is best as an anchor point, not the only support. Use it at the top and add side supports so the weight is distributed.
How do I hang garland on a brick house with no trim?
Start with brick clips at the top corners, then add additional clips down the sides if the garland is heavy. If clips do not fit your brick profile or layout, look for exterior hangers designed for masonry attachment without drilling, or use a freestanding porch column or railing as your anchor instead.
Will suction cups work outdoors?
Suction cups are often unreliable on cold, textured, or damp surfaces. For a front door display that stays put, choose tension in a sheltered recess, clips, or exterior edge-grip hangers.
How far apart should supports be?
For light garland, every 18 to 24 inches can work. For thick faux garland, real greenery, or decorated garland, aim for every 12 to 18 inches as a starting point, plus extra support at corners.
More porch and window sparkle
If you are building a full front entry moment, these Garland Glow ideas pair beautifully with door garland:
Now your doorway can wear its winter greens proudly, and your trim stays as smooth and happy as freshly fallen snow.