Let's gather some sparkle and make your home merry and bright! If you love that warm, knitted-sweater feeling but not the price tag of fancy craft gadgets, this yarn garland is for you. With a bit of cardboard, scissors, and a simple measuring trick, you can make neat, matching pom-poms and tassels that look intentionally styled, not lumpy and last-minute.
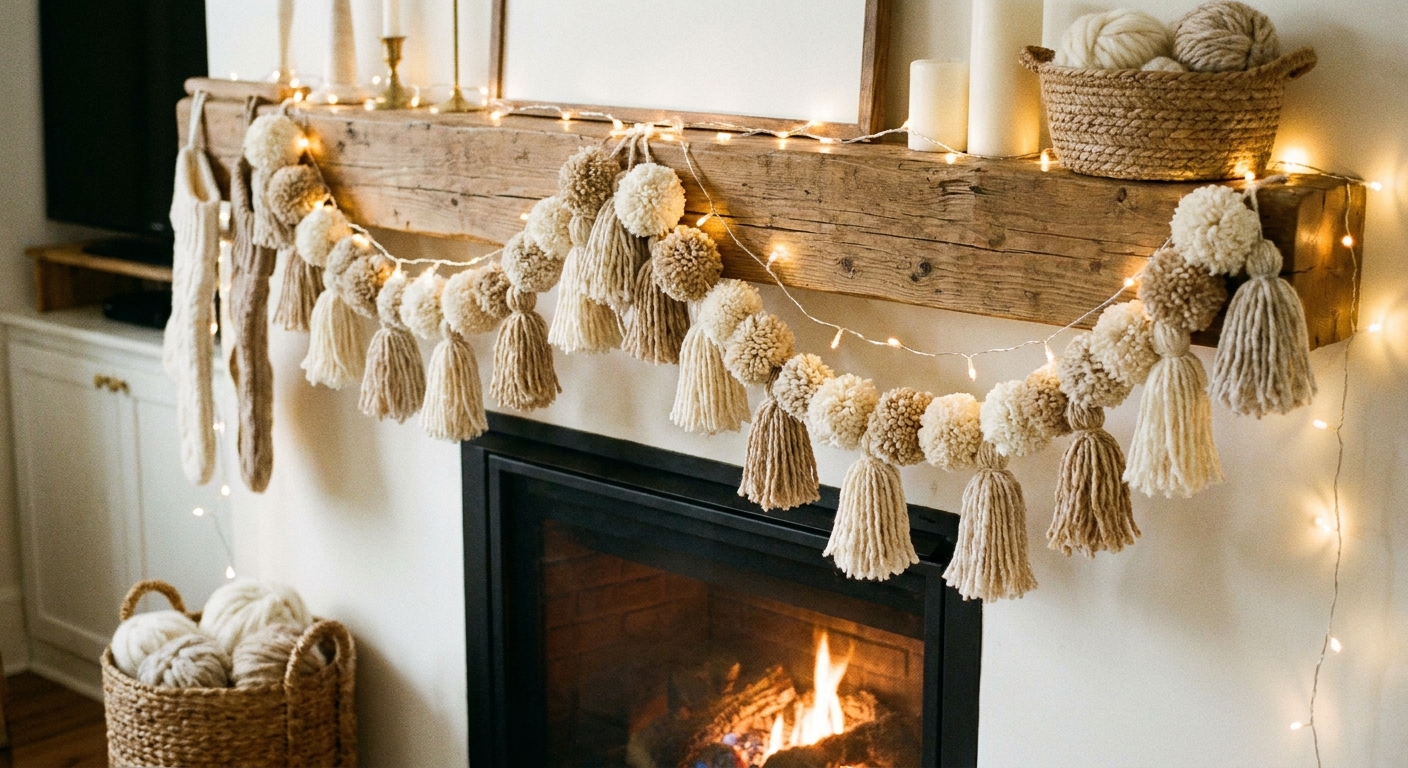
What you need (no special tools)
- Yarn (worsted-weight is easiest to work with). For a typical 5 to 6 ft. garland, plan on roughly 80 to 160 yards, and grab a little extra if you like very full pom-poms or chunky tassels.
- Cardboard (cereal box or shipping box)
- Scissors (sharp ones make cleaner pom-poms)
- Tape (optional, for reinforcing cardboard edges)
- Ruler or measuring tape
- Large needle or a small safety pin (to thread yarn onto the garland strand)
- Twine, ribbon, or extra yarn for the main garland strand
Nice-to-have: a fork (for tiny pom-poms), a comb (to fluff tassels), and a small piece of yarn in a contrasting color for a cute tie detail.
Quick safety note: If kids are helping, let them do wrapping and counting, but keep scissors and needles as grown-up-only tools.
Quick planning: size, spacing, and yardage
Before cutting anything, decide on three little choices. These keep the garland looking uniform and polished.
- Garland length: measure the spot you are decorating, then add 12 to 18 inches extra on each end for tying.
- Pom-pom size: 2.5 to 3 inches looks cozy on a mantel. 1.5 to 2 inches is great for a tree or banister.
- Spacing: a classic look is 4 to 6 inches between pieces. For a fuller look, go 2 to 3 inches.
Easy recipe (balanced and full): For a 6 ft. garland, try 9 pom-poms plus 8 tassels, spaced about 4 inches apart. With worsted-weight yarn, this layout often lands around 100 to 170 yards, depending on how tightly you wrap and how much you trim.
If you are hanging on a mantel, it pairs beautifully with soft lights. For a safe, cozy glow idea, visit Layer a Mantel With Flameless Candles and Fairy Lights.
Make uniform pom-poms with a cardboard donut
This method is the secret to consistent size without a store-bought pom-pom maker.
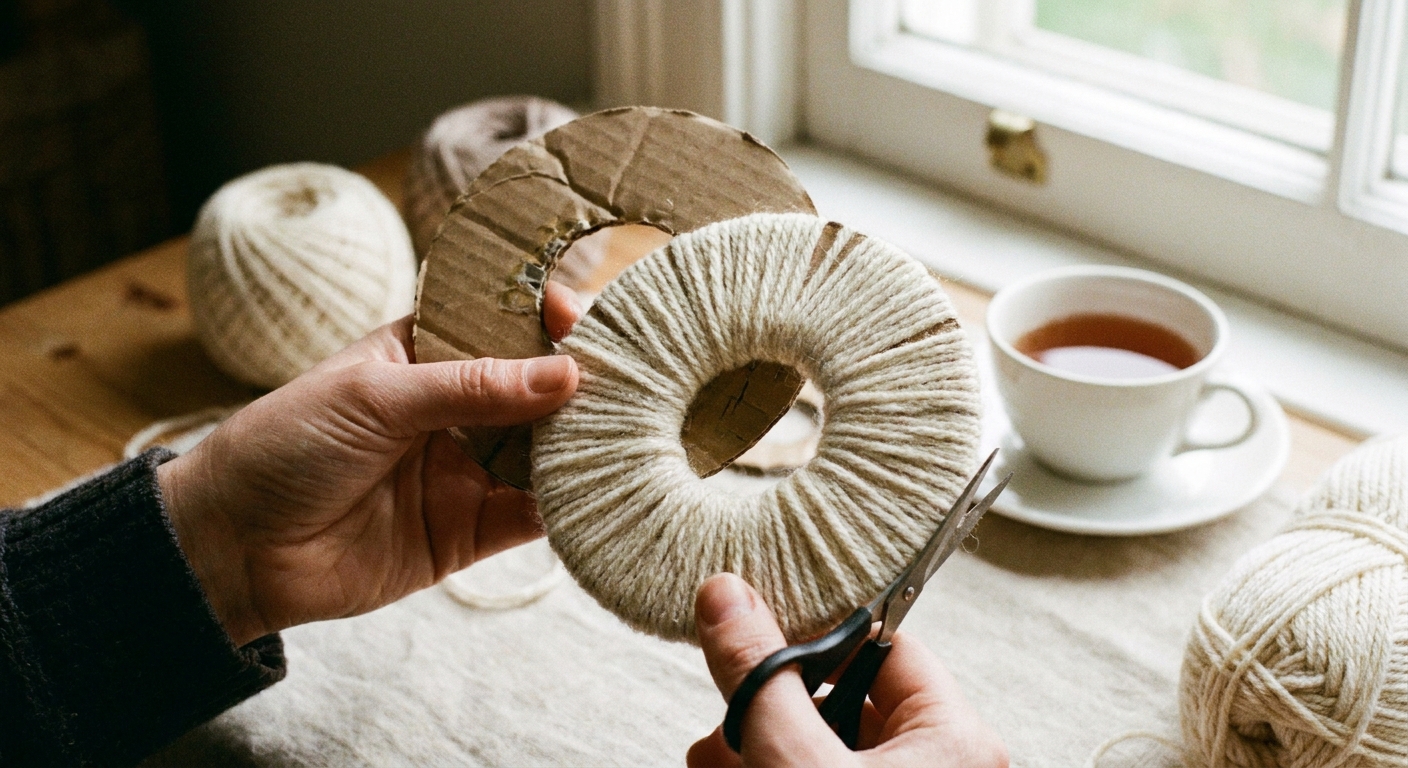
Step 1: Cut a cardboard donut (measured)
Cut two matching rings from cardboard.
- Outer circle diameter: choose 3.5 inches for a pom-pom that typically lands around 2.5 to 3 inches after tying and trimming
- Inner hole diameter: cut a 1.5 inch hole
Tip: If you want smaller pom-poms, reduce both circles evenly. Keeping the inner hole fairly open makes wrapping and cutting much easier.
Step 2: Wrap yarn evenly
Stack the two cardboard rings together. Wrap yarn around the ring, passing through the center hole each time. Keep the wraps snug but not so tight that the cardboard bends.
- For medium fullness: wrap until the inner hole looks about half filled.
- For extra plush: wrap until the inner hole is nearly closed.
Uniform trick: Count wraps for the first pom-pom, then use the same number for the rest. A helpful starting point for worsted-weight yarn on a 3.5 inch ring is 120 to 170 wraps, depending on how fluffy you want it.
Step 3: Cut, tie, and secure (a more secure tie)
- Slide scissors between the two cardboard rings and cut all the way around the outer edge.
- Cut a 10 inch piece of yarn. Slip it between the rings and tie a tight double-knot around the center bundle.
- For extra security, tie a square knot (right over left, then left over right), then add a second knot. This helps reduce shedding, although very fuzzy or loosely spun yarn can still shed a bit.
- Pull the cardboard rings off, or tear them away if needed.
Keep the tails: Do not trim the tie tails yet. Those tails are perfect for attaching the pom-pom to your garland strand.
Step 4: Trim into a sphere
Fluff the pom-pom, then trim a little at a time while rotating it. Aim for a tidy ball shape.
- If one side looks thin, trim the thicker side a bit more and trim the thin side less. This evens the shape without making the thin spot worse.
- If your yarn is twisty, roll the pom-pom between your palms to help it bloom, then trim again.
Fiber note: Smooth, tightly spun acrylic usually trims cleanly and holds a round shape well. Wool blends can look extra cozy but may shed more. Cotton tends to look crisp and a little less fluffy unless you wrap a lot.
Make matching tassels with a cardboard wrap
Tassels bring movement and that cozy, vintage holiday texture. This measured wrap method makes each tassel the same length.
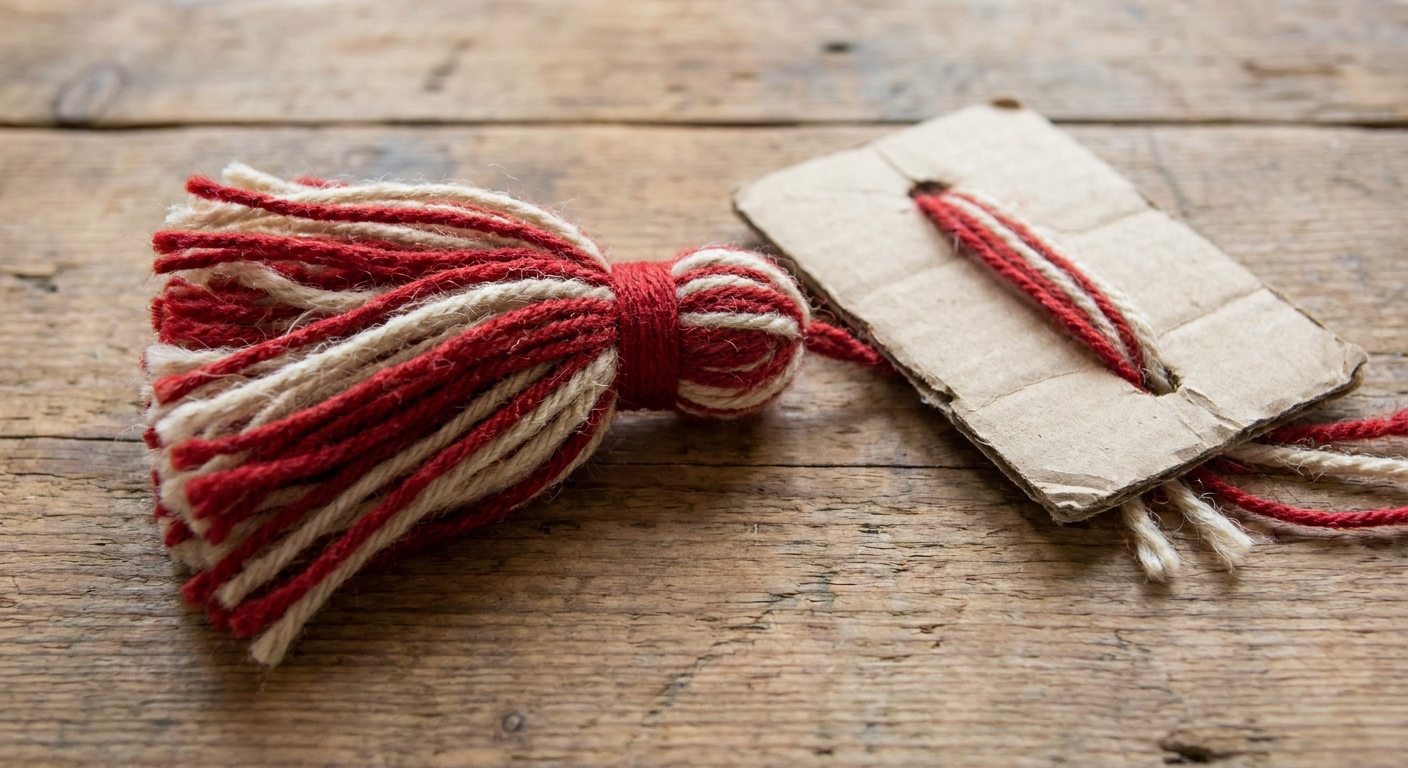
Step 1: Cut a tassel template
Cut a rectangle of cardboard. The height of the cardboard sets the tassel length.
- Template height: 6 inches for a 5 to 5.5 inch finished tassel after trimming
- Template width: anything comfortable to hold, about 4 inches
Step 2: Wrap and tie
- Wrap yarn around the cardboard 50 to 80 times for a medium tassel. More wraps make a thicker tassel.
- Cut yarn. Slide a 12 inch piece under the top wraps and tie a firm double-knot. This top tie is the hanger.
- Slip the wrapped bundle off the cardboard.
Step 3: Create the tassel neck
- Cut another 12 inch piece of yarn.
- About 3/4 inch below the top tie, wrap this yarn around the bundle 10 to 14 times.
- Tie the ends tightly and tuck them into the tassel body with a needle, or trim close.
Step 4: Cut and trim the fringe
Cut through the bottom loops. Comb the fringe gently with your fingers (or a wide-tooth comb) and trim the ends straight.
Uniform trick: Stack two tassels side by side and trim them together so the lengths match.
Assemble the garland (two tidy options)
Pick the finish you like best. Both avoid extra tools and keep your pieces from sliding around.
Option A: String everything on one strand
This is the cleanest, most adjustable method.
- Cut your garland strand (twine, ribbon, or yarn) to the measured length plus 24 to 36 inches for tying.
- Add your pieces: For pom-poms, use the long center tie tails to tie the pom-pom onto the strand, then trim. For tassels, thread the top hanger tie onto a needle or safety pin and slide it onto the strand.
- Add a simple knot on each side of every piece to lock spacing in place.
Option B: Tie pieces on top of the strand
This gives a soft, homespun look and is extra easy if your garland is already hung.
- Hang your strand first with a gentle swoop.
- Tie each pom-pom and tassel onto the strand using their long tails.
- Hide knots by fluffing the yarn fibers around the tie point.
If you plan to hang your garland on a mantel without poking holes, the damage-free tricks here are wonderfully helpful: Hang Heavy Garland on a Mantel Without Nails.
Pet-safe tip: If you have cats or chewers, keep tassels shorter, skip long hanging loops, and knot ends firmly so nothing dangles like a toy.
Color ideas that look cozy, not crafty
- Classic cabin: cream pom-poms, deep red tassels, and a touch of plaid ribbon on the ends.
- Scandi soft: all ivory with a few warm gray pieces mixed in.
- Glam mini-moment: cream yarn plus thin gold ribbon tied at every third pom-pom (skip glitter yarn if you want less shedding).
- Playful candy: alternate red and white pom-poms with smaller peppermint-striped tassels.
For more budget-friendly holiday projects that layer in big impact, take a peek at DIY & Budget Decor.
Where to use a pom-pom and tassel garland
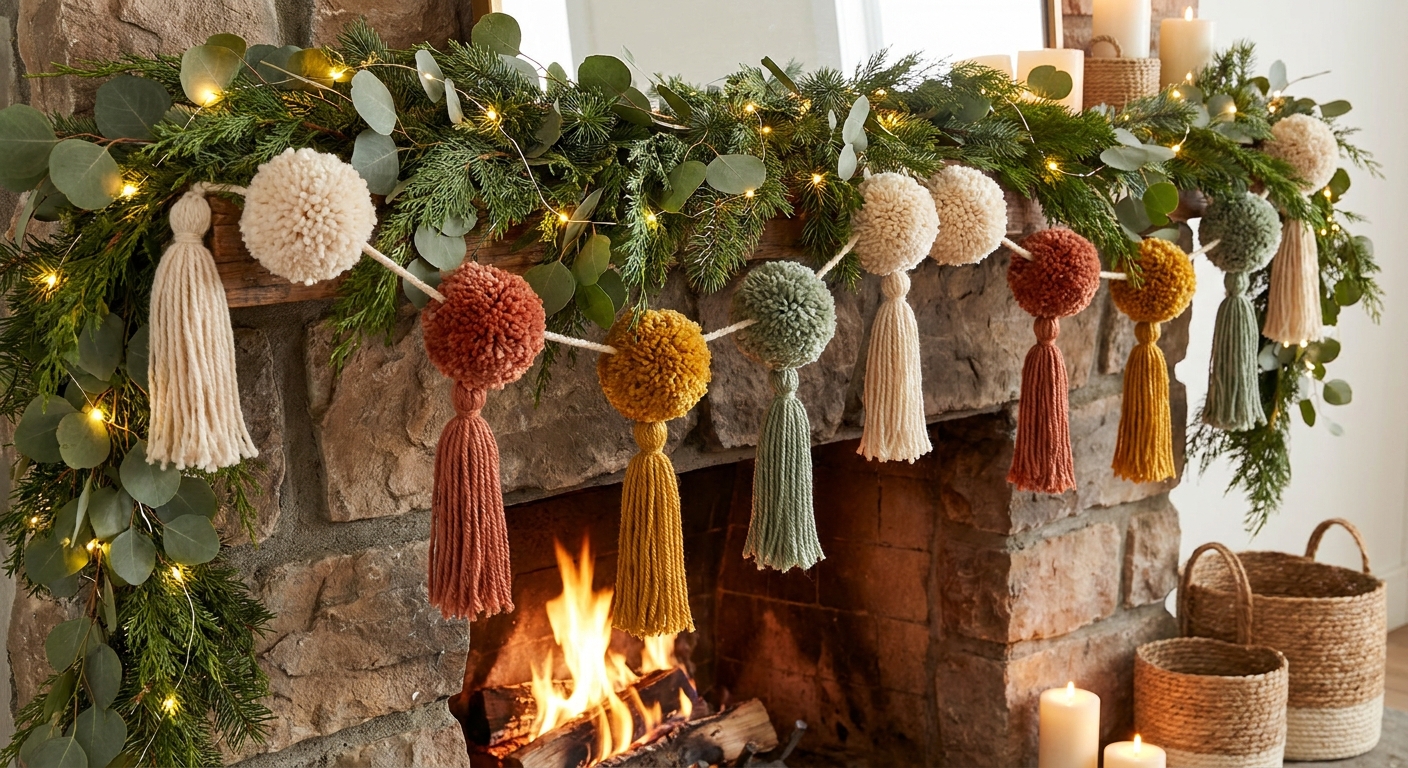
- Mantel: Drape once for a modern look, or double-swoop for extra coziness.
- Staircase banister: Layer over evergreen. For classic wrapping help, see Wrapping Staircase Banisters With Christmas Garland.
- Tree: Use smaller pom-poms so the garland nestles between branches without sagging.
- Window or bookshelf: Hang straight across for a tidy, boutique feel. If you love shelf styling, visit Festive Christmas Bookshelf Styling.
- Kids table: Soft yarn garlands are a sweet, shatter-free accent when paired with easy cleanup decor. Try Mess-Free Christmas Kids Table Decor They’ll Love.
Troubleshooting (quick fixes)
My pom-poms look oval or lopsided
- Trim while rotating the pom-pom slowly. Take off small amounts.
- Make sure your center tie knot is very tight before removing the cardboard.
- If one side is thin, it usually needs more trimming on the opposite (thicker) side, not more trimming on the thin side.
My pom-poms shed yarn bits everywhere
- Double-knot the center tie, then add a third knot.
- Choose a yarn that is not loosely spun, roving-style, or overly fuzzy.
- After trimming, give the pom-pom a gentle shake outdoors and re-trim any long strays.
My tassels frizz or tangle
- Use a gentler combing motion, starting at the ends.
- Trim the fringe cleanly and consider slightly fewer wraps if the tassel is very dense.
My garland pieces slide around
- Tie a small knot on each side of every pom-pom and tassel.
- If using ribbon as the strand, tie attachments tighter and consider rougher twine for more grip.
Simple finishing touches
- Neat ends: Finish each end of the garland with a tassel, then tie a bow on the hanging loop.
- Gentle sparkle: Add a thin metallic ribbon spiral around the garland strand before attaching pieces.
- Soft lighting: Weave micro fairy lights behind the garland (not tightly wrapped through yarn) so it glows without tangling.
Need a little help hiding battery packs and cords? This guide keeps everything tidy: Hide Battery Packs and Cords in Christmas Decor.
FAQ
How long does this take?
Once your cardboard templates are cut, each pom-pom and tassel becomes a quick repeat. Plan on about 1.5 to 3 hours for a full garland, depending on how full you make each piece and how much trimming you like to do.
What yarn works best?
Worsted-weight acrylic or a wool blend is easy to wrap, trims cleanly, and holds shape nicely. Chunky yarn makes fewer wraps, but the pom-poms can look less uniform unless you trim carefully. If shedding drives you nuts, pick a smoother, tighter spun yarn.
Can I make it kid-friendly?
Yes. Skip long hanging loops and keep tassels shorter so they do not get tugged. Yarn decor is wonderfully soft and shatter-free. If kids are helping, let them do wrapping and counting while an adult handles cutting and knot tightening.
How do I store it for next year?
Wrap the garland loosely around a piece of cardboard or an empty paper towel tube. Store in a box where the pom-poms are not squished.