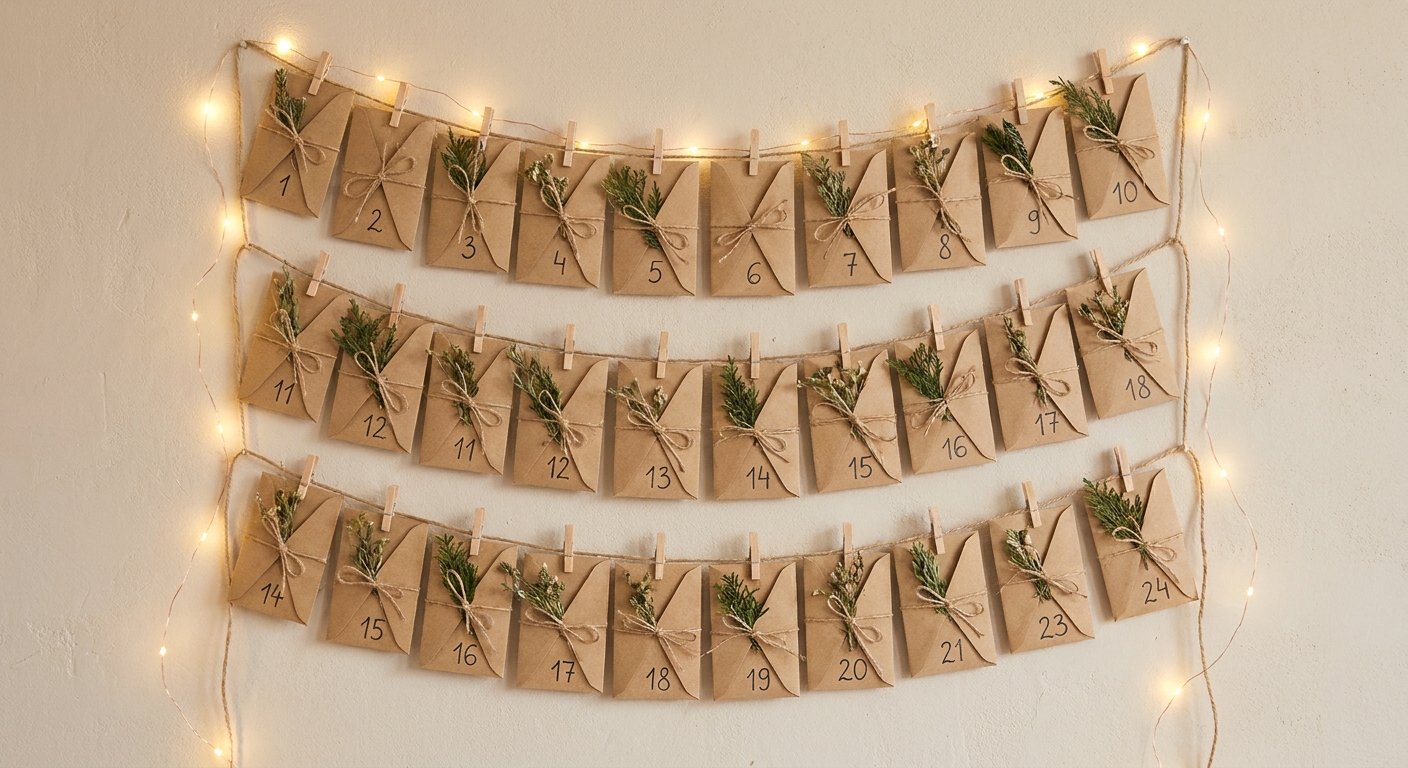
Let’s gather some sparkle and make your home merry and bright! This DIY wall-mounted advent calendar uses simple kraft envelopes and a length of twine to create a clean, cozy countdown that looks sweet on any wall. The best part is what goes inside: tiny handwritten activities that turn December into a string of warm little moments.
And if you do not celebrate Christmas, this still works beautifully as a winter countdown. Swap in seasonal activities, little notes, or simple daily intentions.
What you’ll need
Keep it budget-friendly and flexible. Many of these supplies can be swapped with what you already have.
- 24 kraft envelopes (mini coin envelopes or A-style small envelopes both work)
- Twine (jute twine for rustic, cotton baker’s twine for a cleaner look)
- 24 mini clothespins or small binder clips
- Wall-safe hanging method: removable hooks, removable mounting strips, or washi tape (test first in a hidden spot, since paint finishes and wallpapers vary)
- Scissors
- Marker or pen for numbering
- Optional decor: faux greenery picks, ribbon scraps, tiny bells, dried orange slices, star garland, fairy lights
For the activity cards: cardstock scraps, index cards cut down, or even folded printer paper.
Quick safety note: keep envelope contents light and fairly flat so your hooks stay secure. If kids are opening these, skip small hard candies or tiny items for toddlers, and consider allergies if you add treats.
Pick the size and layout first
Before anything goes on the wall, decide how you want the calendar to read at a glance. That keeps the finished piece looking intentional and not tangled.
Three easy layouts
- Classic 2 rows of 12: balanced and easy to fit above a console or desk.
- 4 rows of 6: great for narrower wall sections.
- Tree shape: widest at the bottom, narrowing toward the top for a subtle Christmas silhouette.
Quick spacing trick: lay envelopes on the floor in your chosen shape, then measure the width and height. Add about 2 to 3 inches (5 to 8 cm) extra on each side for a little breathing room and any greenery or ribbon accents.
Even easier: use painter’s tape to map out the outer edges (or row lines) on the wall first. It is a fast way to preview spacing before you commit to hooks.
Step-by-step: Build the wall-mounted calendar
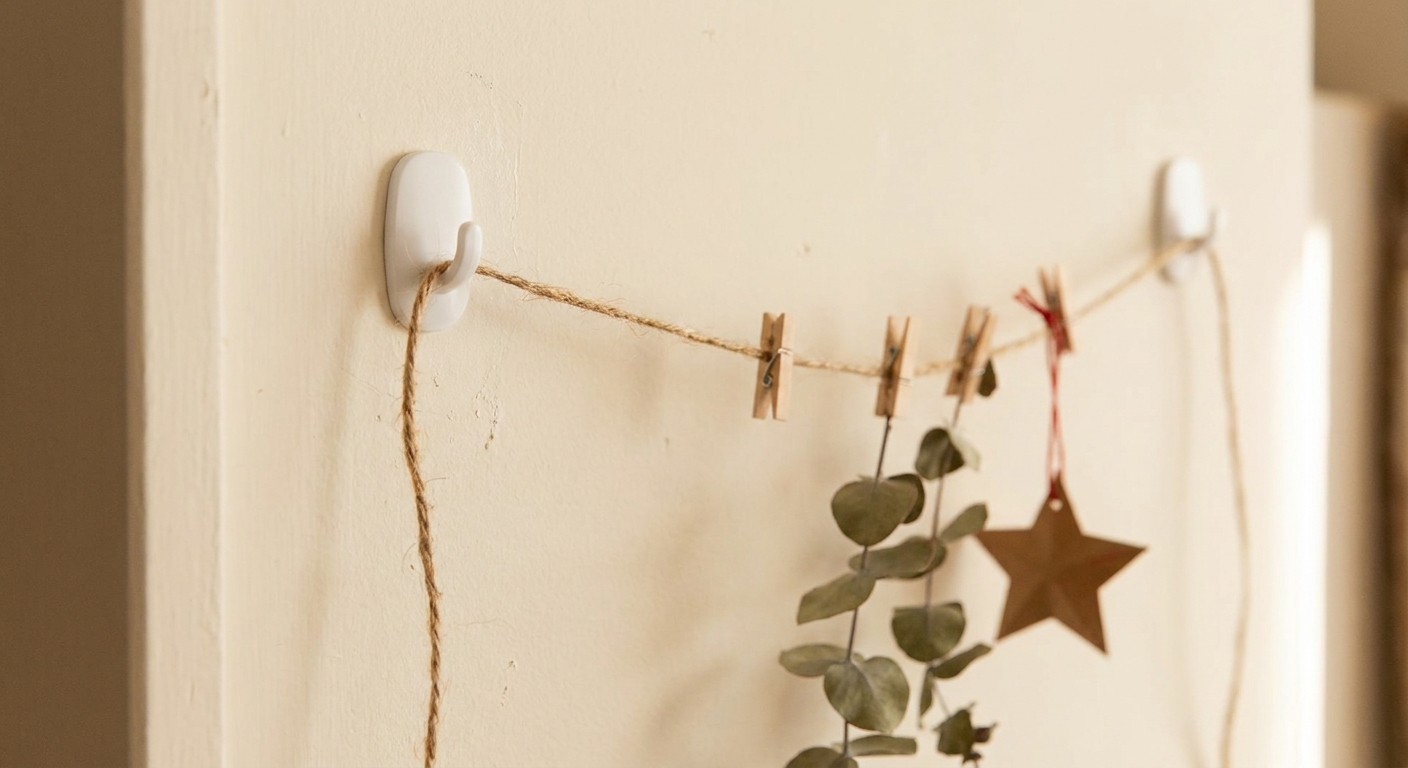
1) Cut and hang the twine
Cut one long length per row. The simplest formula is row width + 8 to 12 inches (20 to 30 cm) extra for tying, wrapping, or adjusting.
- For 2 rows, plan for two long strands.
- For 4 rows, cut four strands.
Attach removable hooks (or mounting strips) at each end of the row. Pull the twine taut, but not banjo-string tight. A slight dip looks charming and can help reduce sliding, especially if your twine is a bit grippy.
2) Number your envelopes
Write 1 through 24 on the front of each envelope. For a minimalist look, keep the numbers small and placed in the same corner on every envelope.
- Neat and modern: black pen, simple numerals.
- Cozy and whimsical: gold marker, slightly larger numbers.
- Extra tidy: write numbers before stuffing, while envelopes are flat.
3) Prepare the activities (the real magic)
Cut 24 small cards that fit inside your envelopes. A good starting size is about 2 x 3 inches or whatever slips in easily without bending.
Two ways to do it:
- One activity per day: simple, calm, and quick to prep.
- Mix and match: add an activity card plus a tiny bonus like a sticker, a tea bag, or a joke. Keep it flat so envelopes still clip nicely.
Tip: if you want to avoid kids peeking, fold each card twice so the writing is hidden until it’s opened.
4) Fill and seal
Place the activity cards inside. Seal the envelopes with their built-in flap, a tiny piece of washi tape, or a simple tuck-in if you want them reusable next year.
If the envelope flap pops open, use a small dot of removable tape. Skip strong adhesives so you can reuse everything.
5) Clip envelopes to the twine
Clip each envelope in order, or mix the numbers around for a playful scavenger style. If you mix them, make it part of the fun: each day, hunt for today’s number and pull only that envelope down.
If you’re doing a tree shape, keep higher numbers near the top so the calendar still feels like a countdown when you glance at it.
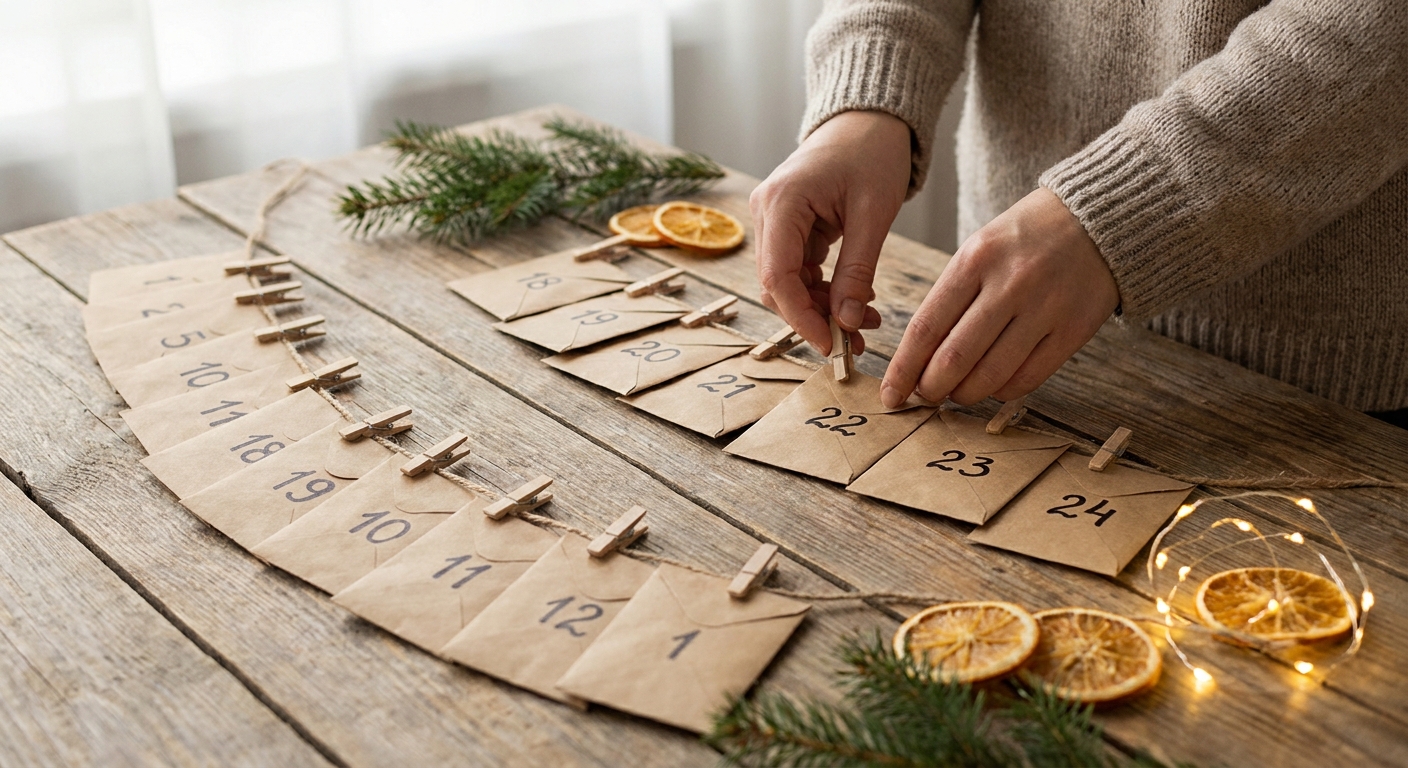
6) Add simple accents, if you want
This calendar is lovely plain, but a few small details can make it glow without turning busy.
- Greenery: tuck short faux evergreen sprigs behind the top row hooks.
- Ribbon: tie one small bow at each twine end.
- Lights: drape a thin strand of warm fairy lights around the perimeter of the calendar (keep the battery pack easy to reach). For cord and battery neatness, this guide helps: Hide Battery Packs and Cords in Christmas Decor.
Handwritten activity ideas
Keep activities short, specific, and easy to say yes to on a busy day. Here are plenty of ideas to fill all 24 envelopes, or to build your own mix.
Cozy at-home activities
- Make hot cocoa with a topping bar
- Light a candle and read one Christmas picture book
- Wear holiday pajamas for an hour
- Write one thank-you note
- Play a 10-minute holiday music dance break
- Build a paper snowflake and hang it in a window
- Pick one shelf to holiday style with a mini garland
Decor and make-it-merry tasks
- Hang a simple ribbon on one doorknob
- Add a bowl of ornaments to the coffee table
- String lights in one unexpected spot
- Make a tiny centerpiece with candles and greenery
- Choose tomorrow’s outfit and add a festive accessory
If you’re craving more low-cost decor ideas that feel big impact, hop over to DIY & Budget Decor.
Kindness and connection
- Text someone a specific compliment
- Leave a treat for a neighbor
- Write three things you’re grateful for
- Make a card for someone who could use cheer
- Donate one item you no longer use
Out-and-about mini adventures
- Drive to see Christmas lights
- Pick up a festive drink and take a short walk
- Choose one small toy or book to donate
- Visit a local tree lot just to smell the pine
Make it minimalist
For a clean, modern look, keep your palette tight and your shapes simple.
- Color palette: kraft + black + greenery
- Twine choice: natural jute for rustic, white cotton for modern
- Consistent numbers: same pen, same corner placement
- Uniform clips: all wood or all black metal
If your space leans elegant and candlelit, warm white lights and a few gold accents will blend beautifully with mantel decor. This is a lovely companion idea for glow: Layer a Mantel With Flameless Candles and Fairy Lights.
Make it kid-friendly
Kraft envelopes are a sweet way to keep the calendar calm and clutter-free, especially with excited little hands nearby.
- Choose clips over tape so envelopes are easy to remove and open.
- Keep activities short (10 to 20 minutes) on school nights.
- Add one simple tactile surprise now and then: a small sticker, a punch-out paper star, or a temporary tattoo.
- Use a low-hanging row so kids can reach day numbers safely without tugging the whole display.
For more holiday table ideas that are fun but low-fuss, you might like Mess-Free Christmas Kids Table Decor They’ll Love.
Where to hang it
This calendar works best where it will be seen daily. Pick a spot that fits your routine, not just your layout.
- Entryway wall: an instant hello of holiday cheer
- Kitchen wall: easy to grab each morning
- Dining area: a sweet dinnertime tradition
- Near stockings: keeps all the countdown magic together
Wall tip: removable hooks and strips typically do best on smooth, clean surfaces. Textured walls, matte paint, and wallpaper can be trickier, so always test your method in a hidden spot and follow the product instructions.
If you are hanging near trim or painted woodwork and want to avoid damage, this guide is handy: Hang Front Door Garland Without Damaging Trim.
Troubleshooting
The twine keeps sagging
- Use one extra hook in the middle for long rows.
- Switch to slightly thicker twine, or double it up.
- Reduce the number of envelopes per row by adding another row.
Envelopes slide toward the center
- Tie tiny knots in the twine between envelopes to stop the clips.
- Use binder clips with a firmer grip.
It looks uneven on the wall
- Mark hook spots lightly with painter’s tape first.
- Step back and adjust row spacing before adding envelopes.
Activities feel too hard to keep up with
- Swap in choose-one cards like: “Pick one: cocoa, carols, or a holiday movie.”
- Add restful days: “Early bedtime” or “quiet hour with a book.”
Simple variations
Once you love the basic build, it is easy to tailor it to your space.
- Single-strand vertical: one long twine line with envelopes stacked down a doorway side (great for tight spaces).
- Clipboard style: clip twine to a wooden rail or dowel for a more structured look.
- Stocking swap: use mini muslin bags instead of envelopes for a softer texture.
- Color-washed paper: choose cream, white, or gray envelopes for a snowy palette.
Final cozy touch
Once your envelope advent calendar is up, take a moment to add one warm glow nearby, a small lamp, a candle, or a tiny string of lights. Minimalist does not mean chilly. It means every little detail gets to shine.
When you are ready for the next budget-friendly project, explore more ideas here: DIY & Budget Decor.