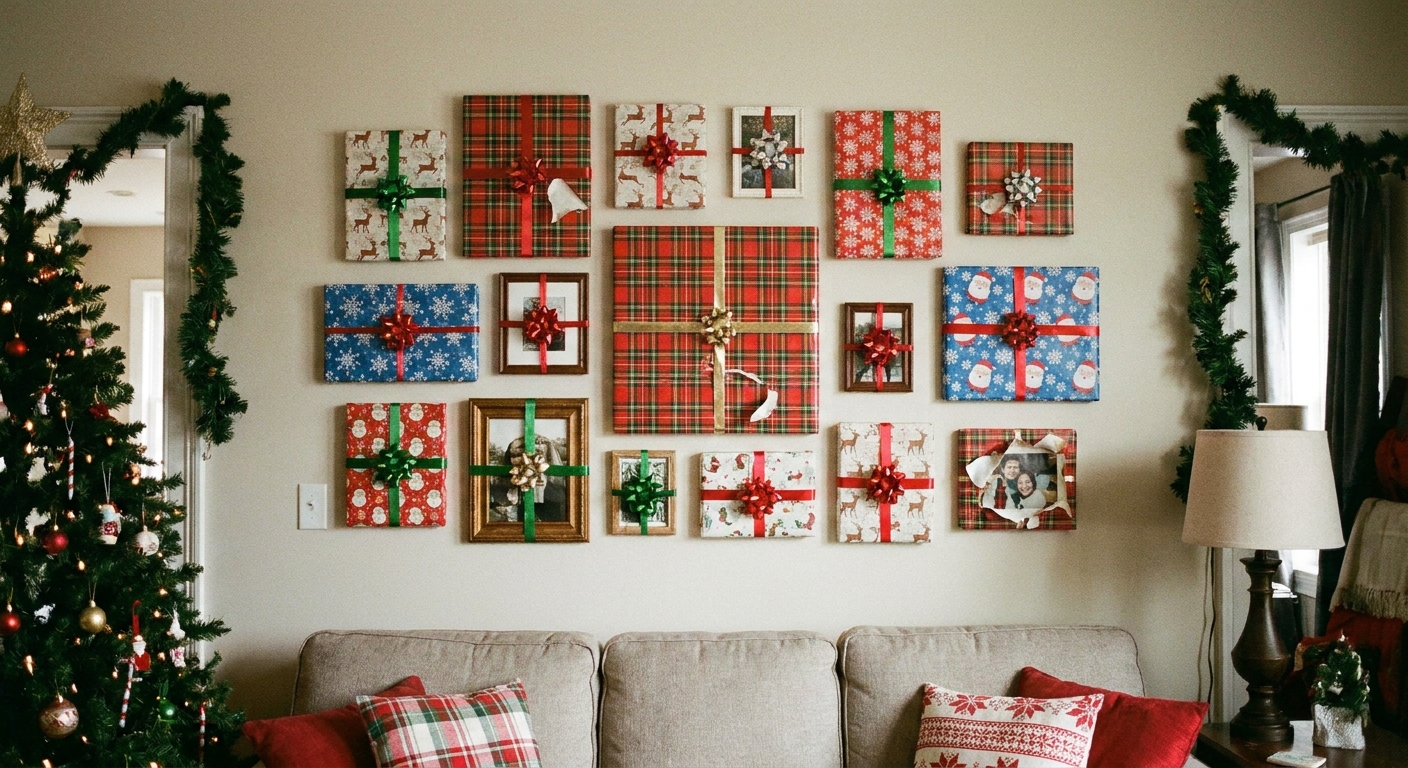
Let's gather some sparkle and make your home merry and bright! If your walls feel a little too “everyday” in December, there is a delightfully sneaky fix: temporarily wrap your existing wall art and picture frames so they look like holiday gifts. No new decor to store, no nails, and the whole room instantly reads Christmas.
Quick visual note: if your frames have glass, matte paper (or kraft paper) tends to photograph better and glare less than super glossy wrap once the tree lights turn on.
Before you start
Not every artwork wants the full gift treatment. Pick what will look charming and unwrap cleanly.
- Best candidates: standard frames with glass, simple wood frames, poster frames, lightweight canvases, small to medium pieces.
- Skip or use a lighter method: very heavy frames, ornate gilded frames with deep grooves, fragile antique finishes, and anything hung in a high traffic spot where ribbon tails will get tugged.
- Quick style tip: wrapping 1 out of every 2 or 3 pieces in a gallery wall looks intentional, and leaves some breathing room so it does not feel like a prank in wrapping paper form.
- Steamy zones: bathrooms and splashy kitchen areas can make paper curl and tape let go. In humid spots, stick with ribbon-only styling (Method 3) or wrap pieces that are farther from sinks and stoves.
Supplies that stay removable
The secret is using low-tack products and keeping adhesive off the decorative frame finish whenever you can. Even “removable” tapes can behave differently on matte paint, aged lacquer, gilding, unfinished wood, or anything that has been in heat or humidity.
- Wrapping paper (thicker paper hides bumps best)
- Ribbon (wired ribbon is easiest for bows, but any ribbon works)
- Painter’s tape or washi tape for paper-to-paper and paper-to-back contact (usually releases cleanly, but not always)
- Removable mounting squares (optional) to keep a bow from sliding (use on paper-to-paper or the frame back when possible, and test first)
- Scissors
- Ruler or measuring tape
- Optional: kraft paper or tissue paper (as a protective layer under tape)
Sticky note from Sprig: avoid taping directly to artwork surfaces, raw canvas, or delicate frame finishes. When in doubt, tape to the back of the frame or to a protective layer. If you are nervous, do a small test on the back for up to 24 hours before you wrap the whole piece.
Method 1: Full wrap
This is the true present look, with folded corners and ribbon all the way around.
Step-by-step
- Take the frame off the wall. Place it face down on a clean towel so the glass does not scratch.
- Cut paper with plenty of margin. Add about 2 to 3 inches on each side so you can fold neatly to the back.
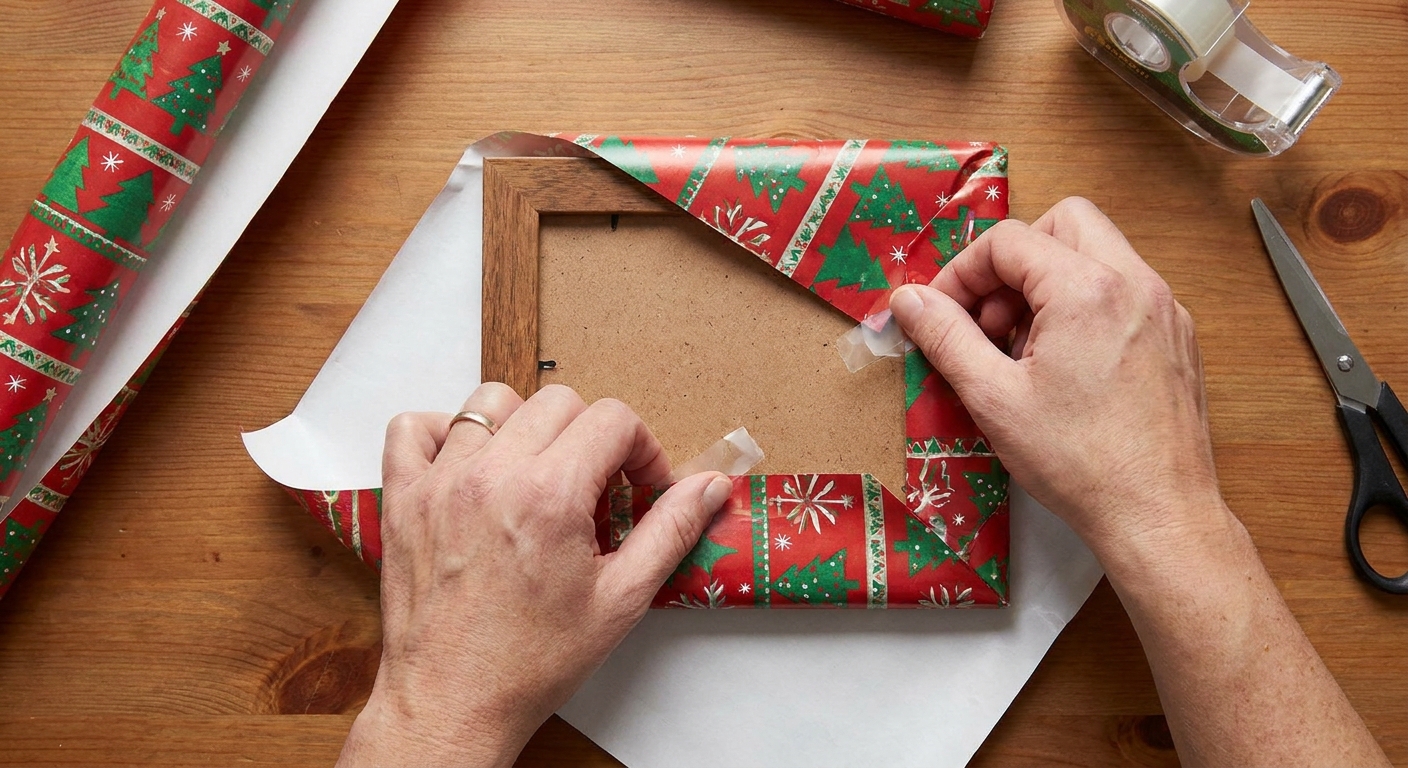
- Center the frame and wrap like a gift. Pull one long side up and tape it to the back. Pull the opposite long side up, snug (not tight), and tape to the back.
- Fold the short ends. Make crisp triangles like wrapping a box, then fold the flap up and tape to the back. Keep all tape on the back where it will not show.
- Add ribbon. Wrap ribbon around the frame and tie a bow on the front, then rotate it slightly off-center for a playful look.
- Hang it back up. Use the original hardware. If ribbon makes the frame sit weirdly, keep ribbon off the back where the hanger touches. You can also do a faux ribbon cross on the front only, secured to the wrapping paper (not the frame), or switch to Method 3.
Make it look polished
- Match papers across the room: choose one paper for small frames and one coordinating paper for larger frames.
- Use the same ribbon everywhere: repeating one ribbon color makes mismatched frames feel cohesive.
- Keep edges crisp: run a finger along folds gently, without pressing so hard you stress the frame backing or press down on the glass.
Method 2: Front panel wrap
If a full wrap feels like too much handling, this method covers only what people see from across the room.
Step-by-step
- Measure the frame’s visible front (including the border).
- Cut a paper panel about 1 inch larger on all sides.
- Attach the panel at the back edge. Wrap the extra inch around the sides and secure on the back with painter’s tape or washi tape. Keep tape away from delicate finishes by taping paper-to-paper when possible.
- Add a ribbon cross on the front. Use a separate ribbon piece, tied snugly, so there is no need for tape on the frame front.
This one is also great for frames that must stay on the wall. Go slowly, support the frame with one hand, and avoid pushing on the glass while you tuck the edges around.
Method 3: Ribbon only
Want the holiday hint without covering your photos? Ribbon alone can turn a frame into a present shape in seconds.
- Wrap ribbon vertically around the frame and tie at the back (above the hanger if possible).
- Wrap a second ribbon horizontally and tie at the back too.
- Add a bow at the top corner or center. For slippery ribbon, use a removable mounting square on the ribbon or paper backing (not on a delicate finish) to keep the bow from drifting.
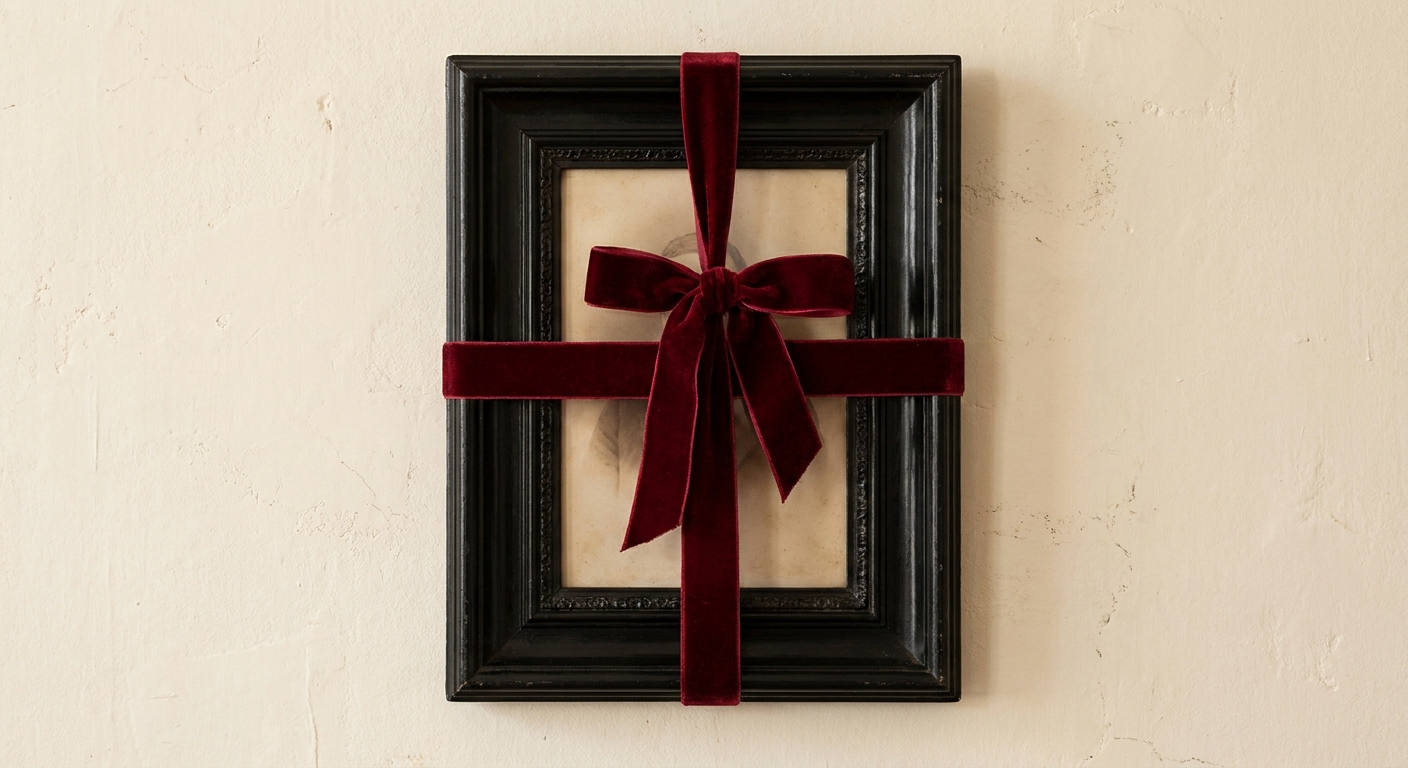
This method is especially nice if you love your year-round art but still want it to join the holiday party.
Canvas art tips
Canvas can look wonderfully gift-like, but it needs a gentle touch.
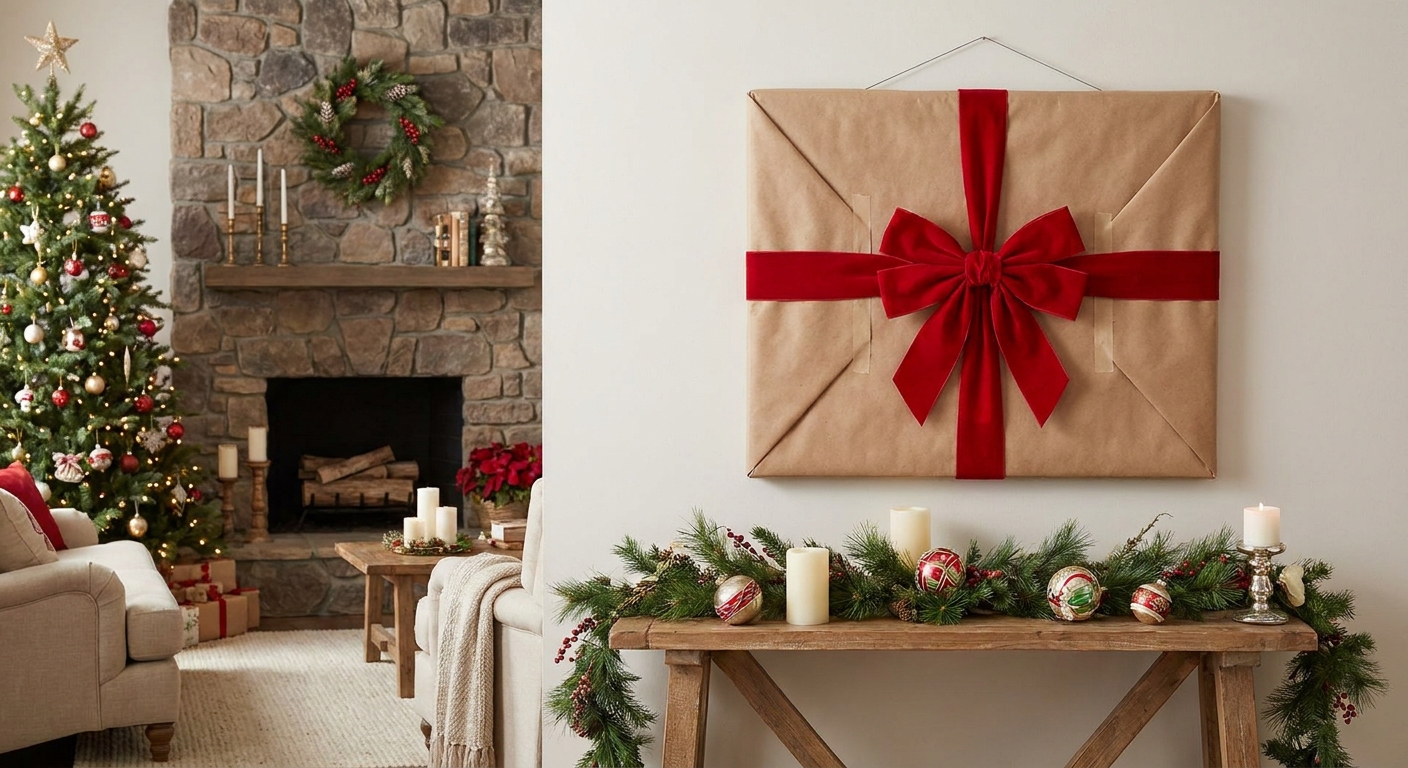
- Avoid putting tape on raw canvas. Instead, wrap paper around the sides and tape only on the back wood stretcher bars.
- Use the front panel method if the canvas edges are textured or painted.
- Skip ribbon that compresses the face. Tight ribbon can dent softer canvas surfaces. Tie ribbon around the back stretcher bars instead.
Make it look intentional
Repeat one theme
- Classic Christmas: red ribbon, kraft paper, little sprig of faux greenery tucked under the bow.
- Modern cozy: matte solid paper, wide satin ribbon, simple bow.
- Vintage sparkle: metallic paper, thin velvet ribbon, small ornament tied into the bow.
Vary bow sizes
Use a bigger bow on the largest frame, smaller bows on the rest. That scale choice makes the wall feel styled.
Add one tiny extra
Tuck a cinnamon stick, a pinecone, or a tiny jingle bell into the bow knot. Keep it lightweight so it does not tug on the ribbon or stress the hanger.
Safety and surfaces
- Keep wrapping away from heat sources like candles, sconces, and fireplaces.
- Give glass a little respect. Do not press hard on the front, and avoid bulky add-ons that could push against the glass or flex the frame.
- Do not block electronics. On digital frames, leave clear access to speaker holes, charging ports, power buttons, and any motion or light sensors.
- Use gentle adhesives only and keep them on the back or on paper. If you are decorating near cords, this guide can help keep things tidy: Hide battery packs and cords in Christmas decor.
- Check hanging stability. Wrapping adds bulk and can change how a frame sits on a hook. Make sure the hanger area is not covered by paper or ribbon, and re-seat the wire or D-rings so the frame hangs level.
Unwrap without damage
- Bring the frame down first. Unwrapping on the wall is how corners get crumpled and paper tears.
- Peel tape slowly at a low angle. If tape resists, warm it with your hand for a few seconds. If it still does not budge, use a hair dryer on low, held at a distance, and keep heat moving so you do not warm the frame finish too much.
- Save the paper as a flat sheet by cutting one seam with scissors instead of ripping. Store it rolled in a gift wrap bin.
- Wipe the frame lightly with a dry microfiber cloth before rehanging.
Best spots for this trick
- Gallery walls: instant holiday makeover with no new frames.
- Hallways: a festive moment that does not take up floor space.
- Above buffets and sideboards: adds height and holiday color without crowding serving areas. If you are styling food spaces too, pair this with Styling a Christmas buffet table.
- Around the mantel: wrapped art looks like stacked gifts without taking up hearth space. For more mantel layering ideas, peek at 10 elegant budget Christmas mantel ideas.
Troubleshooting
Paper looks wrinkly
- Use thicker paper or wrap over a smooth layer of kraft paper first.
- Try the front panel method so folds stay hidden on the back.
Bow slides
- Choose wired ribbon or velvet ribbon for more grip.
- Secure the bow knot to the wrapping paper (not the frame) with a small loop of painter’s tape, or use a removable mounting square on paper-to-paper.
Frame will not sit flat on the hanger
- Keep ribbon and bulky folds off the back where the hanger rests.
- Make sure the hanging wire or D-rings are clear and re-seated after wrapping.
- Switch to ribbon-only styling tied above the hanger.
Worried about residue
- Use low-tack tape and keep it on the paper or the frame backer, not on the decorative finish.
- Do a small test on the back (up to 24 hours) before committing, especially on older or delicate frames.
A cozy finish
Once your wall art is gift-wrapped, the room starts to feel like it is humming with holiday cheer even before the tree lights come on. It is the kind of decor that looks fancy, costs very little, and disappears the moment January rolls in. That is Sprig-approved magic.
If you want to keep the rest of the room just as low-clutter, wander through DIY & Budget Decor for more quick-change Christmas ideas.