Let’s gather some sparkle and make your home merry and bright! If your tree stand is giving more “hardware aisle” than “holiday hearth,” a tree collar is the coziest little fix. This one is budget-friendly and surprisingly chic: a heavy-duty cardboard box wrapped in natural jute rope for a warm, cottage-y look that blends with rustic, modern, and minimalist trees.
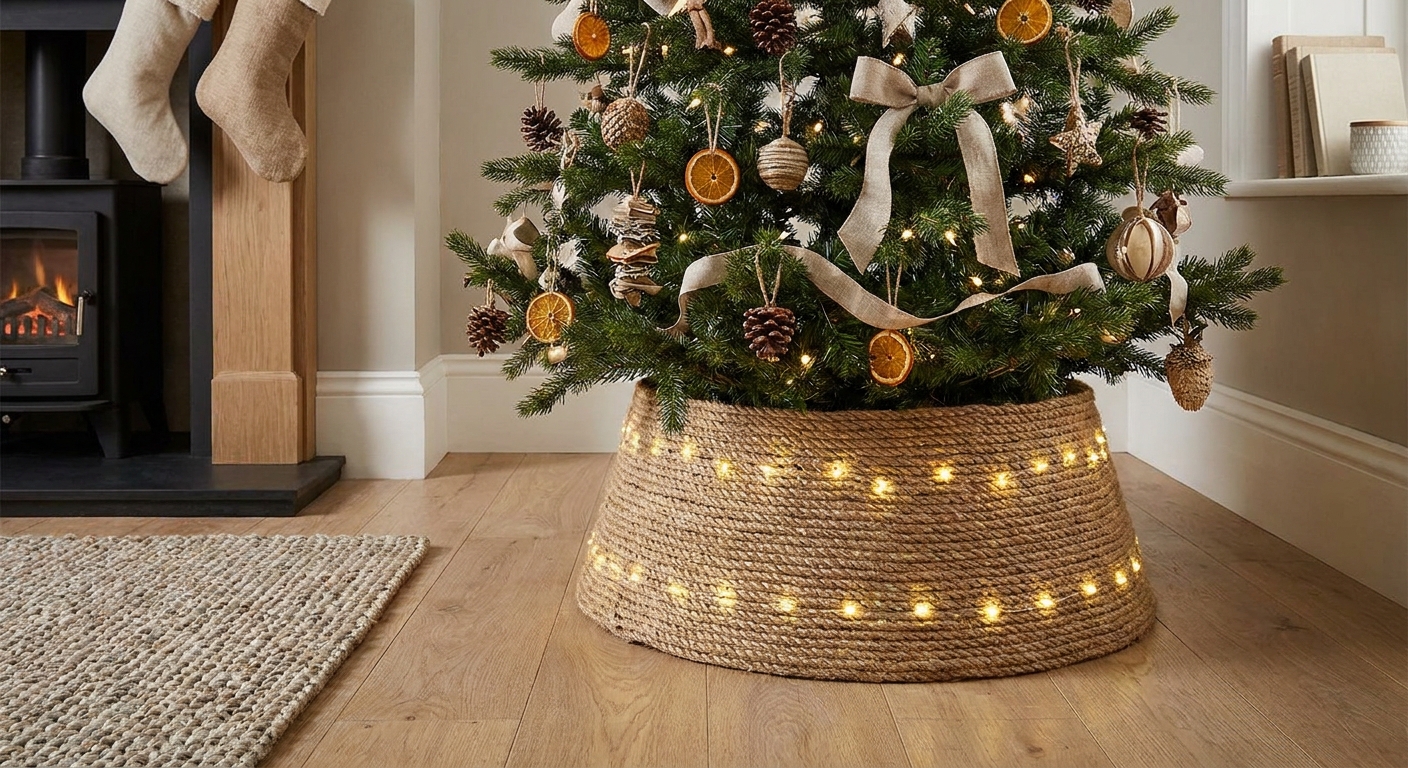
Why jute rope looks so high end
Jute has that “winter cabin” texture that instantly softens the base of a tree. Wrapped tightly, it reads like woven decor, not cardboard. It also plays nicely with lots of themes, especially woodland, Scandinavian, farmhouse, and neutral-gold styling.
Bonus: this collar is lightweight, easy to store, and great for small spaces. If you need more ideas for compact holiday setups, peek at these space-saving alternative Christmas tree ideas.
What you’ll need
- Heavy-duty cardboard box (double-wall if possible). Choose one tall enough to cover the stand and wide enough to clear the tree skirt area you want to hide.
- Jute rope or jute twine. Thicker rope covers faster, thinner twine looks more finely woven.
- Hot glue gun and glue sticks
- Packing tape or duct tape
- Scissors or a utility knife
- Measuring tape (optional but helpful)
- Optional: kraft paper or brown paper bag for smoothing, felt pads for floors, hook-and-loop dots for a removable seam, ribbon, faux greenery picks
- Optional (real tree helper): a small strip of plastic (like a cut piece of trash bag) to line the inside bottom edge as a splash guard
Sprig tip: Rope size changes the whole vibe. Around 3/8 inch to 1/2 inch rope looks chunky and cozy and finishes fast. Thinner twine takes longer, but it curves more smoothly and feels a bit more “basket weave.”
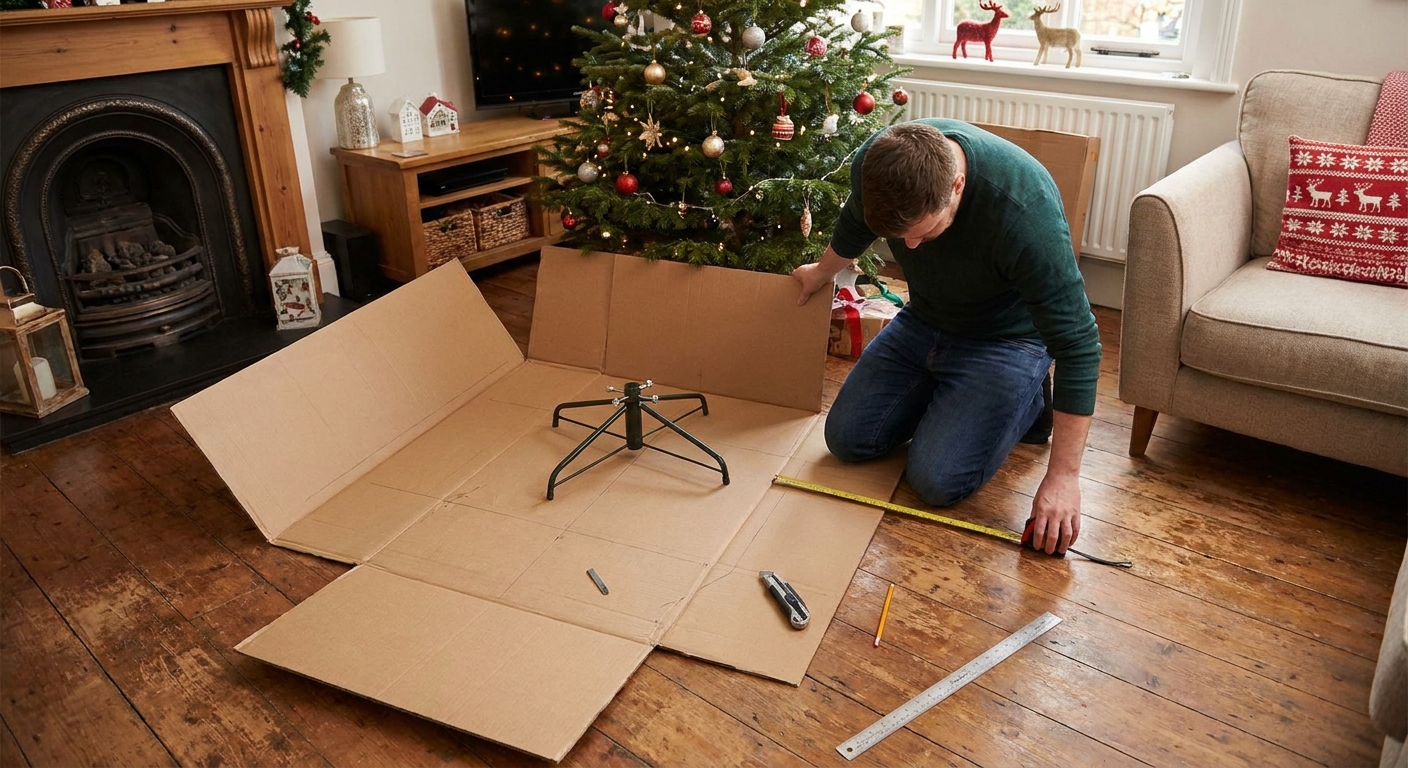
Step 1: Measure the stand area
You only need three numbers:
- Tree stand diameter (widest point)
- Collar diameter (tree stand diameter plus 3 to 6 inches total so it slips on easily and does not crowd the trunk)
- Collar height (typically 8 to 12 inches, or tall enough to hide the stand legs and water basin)
Sprig tip: If you have a real tree and you reach in to water, add another inch or two of wiggle room so hands and a watering funnel can fit comfortably.
Step 2: Turn the box into a collar
Option A: Simple round-ish collar
- Cut the box down to height. Keep the strongest portion of the box, usually the bottom half.
- Make it lay flat. Cut one corner seam so the box opens into one large sheet.
- Form a tube. Roll the sheet into a cylinder shape that matches your collar diameter.
- Tape the seam heavily. Use long strips of packing tape inside and out.
- Reinforce the top edge. Fold the top edge inward about 1 inch if you can, then tape to stiffen.
Option B: Two-piece wrap-around collar
- Create two half-cylinders. Cut the box into two identical panels and curve each into a half-round.
- Reinforce edges. Tape along the vertical edges to prevent bending.
- Plan a closure. For a removable collar, use hook-and-loop dots inside the seam. For a permanent one, use strong tape on the inside and a neat rope seam on the outside.
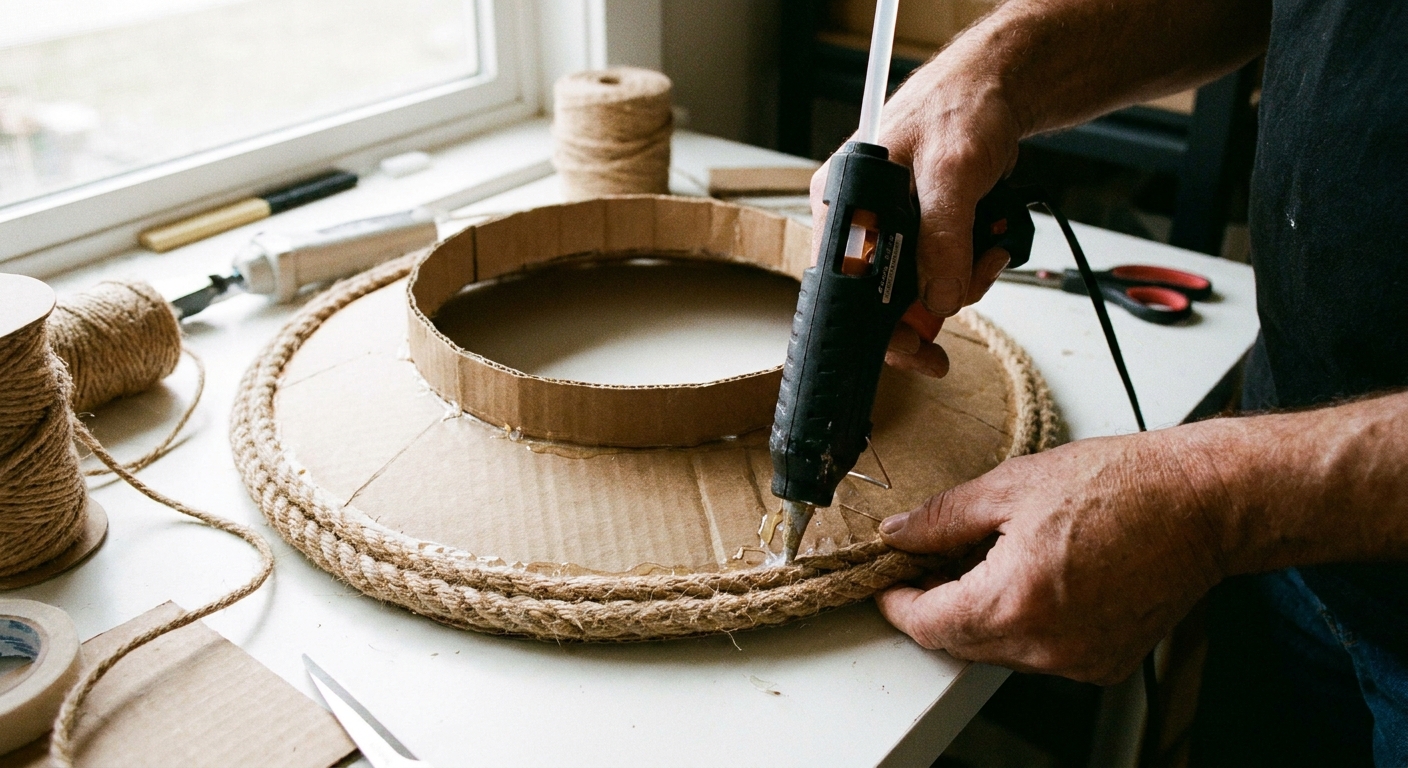
Step 3: Prep the surface
This step is optional, but it makes the final collar look more polished.
- Fill deep dents. Patch weak spots with extra cardboard pieces taped flat.
- Cover loud logos. Wrap the outside with kraft paper or a cut-open paper grocery bag, then tape it down. This helps prevent printed patterns from peeking through gaps.
Step 4: Wrap with jute rope
- Start at the bottom edge. Run a bead of hot glue about 4 to 6 inches long, then press the rope into the glue.
- Keep tension even. Pull the rope snug, but not so tight that it warps the cardboard.
- Work in small sections. Hot glue sets quickly. Short glue lines keep everything neat.
- Keep rows level. Make a light pencil guideline near the bottom to keep your first row straight, then rotate the collar as you wrap so the rows stay even.
- Stack rows tightly. Push each row up against the last so cardboard does not show.
- Finish at the back seam. Cut the rope cleanly and glue the end down firmly.
Sprig tip: If your rope is thick and stiff, angle it slightly as you wrap so it naturally nestles into the row below.
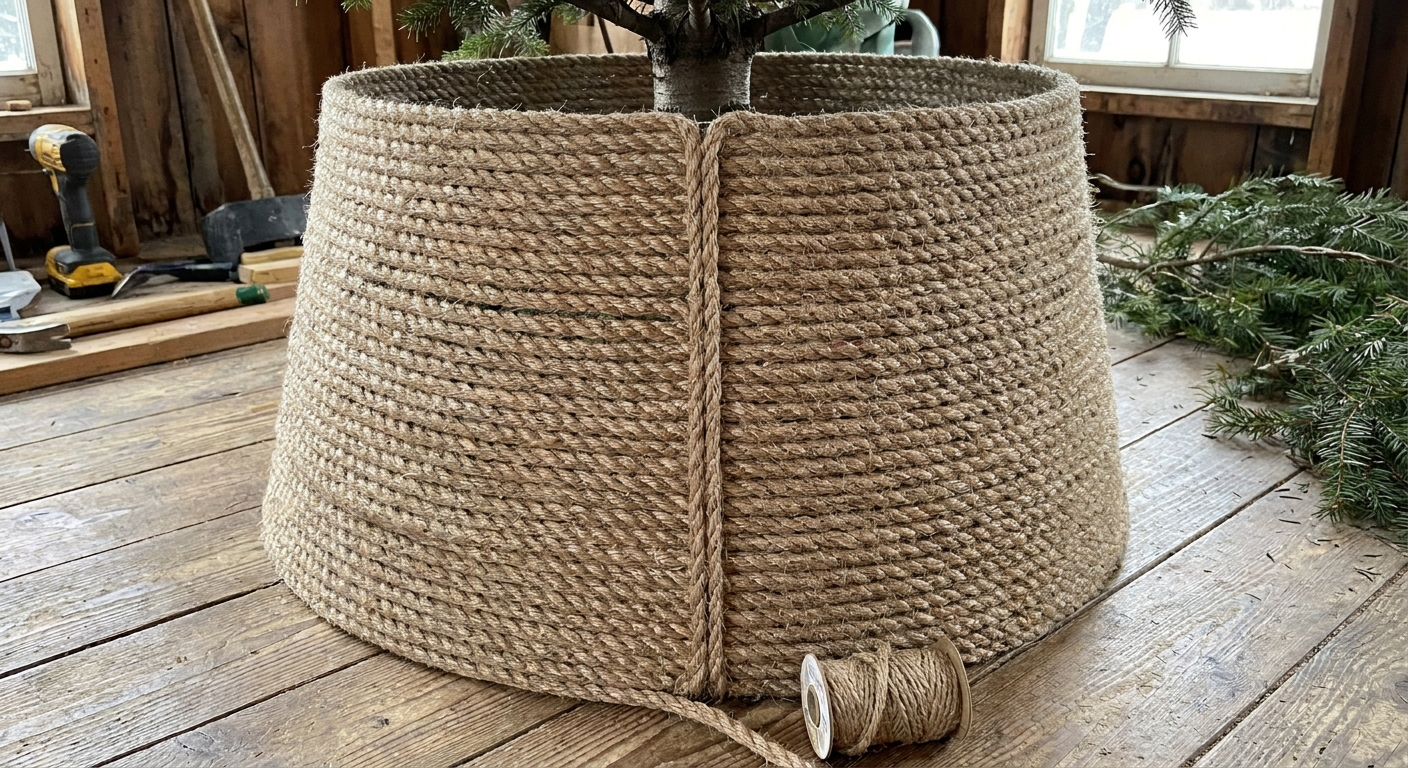
Step 5: Finish the top edge
The top rim is what makes cardboard disappear. Choose one of these tidy finishes:
- Fold-and-wrap: If you folded the top edge inward earlier, wrap rope right over the rim for a rounded finish.
- Rope lip: Glue one final rope row slightly overhanging the inside edge to hide the cardboard line.
- Trim band: Add a thin satin ribbon, velvet ribbon, or a narrow strip of burlap around the top edge.
If ribbon is part of your tree theme, you might enjoy these ribbon cascade ideas for coordinating the whole look.
Step 6: Add stability and floor protection
Keep it from shifting
- Add weight (hidden): If the collar feels too light, tuck a couple of flat stones or small ankle weights into a taped cardboard “pocket” inside the bottom edge. That way the weight cannot slide around or pop loose later.
- Grip strips: Place a few small dots of removable mounting putty under the collar on hard floors.
Sprig tip: Keep any added weight away from the tree stand basin and floor contact points. The collar should sit around the stand, not interfere with it.
Protect delicate floors
- Stick felt pads around the bottom rim so jute does not scratch wood or vinyl.
Watering a real tree with a collar
A rope-wrapped collar can still work beautifully with a real tree. The trick is access and keeping cardboard dry.
- Leave a small gap at the back. Position the seam behind the tree and keep it slightly open for a watering funnel.
- Use a two-piece collar. Open it a bit when watering, then close it back up.
- Add a small splash guard. If you are worried about drips, tape a narrow strip of plastic along the inside bottom inch of the collar. It can help with little splashes, but it will not make cardboard waterproof.
- Blot spills fast. If you spill, blot right away so the cardboard stays sturdy.
Quick truth-in-advertising note: Clear spray sealers can help reduce fuzzing and make the rope easier to dust, but they will not truly waterproof jute and cardboard. Dry is still the goal.
Easy style upgrades
- Snowy look: Dry-brush a little white acrylic paint across the rope for a frosted effect.
- Cozy glow: Tuck a short strand of warm micro lights along the inside top rim so the base softly twinkles.
- Natural garnish: Add a few faux cedar picks at the seam, tied with twine.
- Glam touch: Wrap one thin line of gold cord spiraling up the collar.
If you love mixing cozy texture with a touch of shine, an all-gold tree theme pairs beautifully with natural jute at the base.
Troubleshooting
My rope keeps popping loose
- Use more frequent glue points, especially on curves and seams.
- Make sure the cardboard is dust-free. Wipe it quickly with a dry cloth before gluing.
I can see cardboard between rows
- Switch to a slightly thicker rope, or double up by laying a second strand into the gaps.
- Wrap the base first in kraft paper so any peek-through stays neutral.
The collar looks lumpy
- That usually means the cardboard is dented. Reinforce from the inside with taped-on cardboard patches, then keep your wrap tension steadier as you go.
It smells like hot glue
- Let it air out for a few hours before placing it around the tree.
Safety notes
- Keep rope away from open flame. If your tree is near a fireplace, maintain safe clearance and consider flameless candles for nearby decor. For mantel safety ideas, visit fireplace mantel decor that stays safe with a real fire.
- Watch extension cords. If cords run near the base, route them so the collar does not pinch them. For tidy tricks, see how to hide battery packs and cords in Christmas decor.
- Real tree care: Keep the stand filled and avoid letting cardboard sit in moisture.
Store-bought finishing touches
Before you declare it done, do this quick “chic check”:
- Turn the seam to the back and add a small bow or greenery sprig over it.
- Fluff the lowest branches so they hover just above the collar edge.
- Match textures by repeating jute or twine elsewhere, like on gift wrap or ornament hangers.
Need gift-wrapping inspiration that plays nicely with natural textures? Wrapping wall art like Christmas presents is a fun way to carry the look across the room.
FAQ
How much rope do I need?
Here’s a simple way that works in real life:
- Measure the collar circumference (around the outside).
- Measure the rope diameter (thickness of the rope).
- Estimate the number of rows as: collar height divided by rope diameter.
- Then: circumference multiplied by number of rows equals your rough rope length.
- Add 10 to 20 percent extra for seam overlap, little gaps, and the final top edge finish.
Sprig tip: If you are choosing between two rope bundles, go up. Running out with three rows left is a special kind of holiday heartbreak.
Can I paint the jute rope?
Yes. Dry-brushing works best for a light, textured finish. If you paint heavily, the rope can stiffen and look less natural.
Will this work for a tall or heavy tree?
The collar is decorative, not structural. It should never support the tree. As long as your stand is stable on its own, the collar can simply sit around it.
Can I store it and reuse it next year?
Absolutely. Let it dry completely, then store it in a dry spot. A large trash bag around it helps keep dust off the rope.
More budget-friendly Christmas magic
If you are in a thrifty, twinkly mood, keep the momentum going with a stunning Christmas tree on a $50 budget or browse more ideas in DIY & budget decor.
Now scoot that metal stand out of sight and let your tree feel instantly more polished and cozy. Twine, tape, and a sprinkle of holiday spirit can go a long way.